If you haven’t already, before diving into this guide you should start with our other articles about using the REST API with The Events Calendar and Event Tickets. Get started with the basics and then learn how to add authentication to your requests. Up to this point, we’ve mostly been talking about just retrieving information (GET requests), but in this guide we’re going to dive into POST requests to create new attendees and PUT requests to update existing attendees.
Create a New Attendee
First, set up an authenticated call – in this example we’ll be using an authenticated AJAX call. In your script file, this is what your JS will look like:
$.ajax( {
		method: 'POST',
		url: 'https://your-site/wp-json/tribe/tickets/v1/attendees',
		beforeSend: function ( xhr ) {
			xhr.setRequestHeader( 'X-WP-Nonce', ajax_variable.nonce );
		},
		data: {
			ticket_id: '50',
			full_name: 'Bob Saget',
			email: '[email protected]',
		}
	} )
} );
Let’s break this down:
method: 'POST'– This establishes that we want to add something new to the database (in this case, a new attendee).url: ‘https://your.site/wp-json/tribe/tickets/v1/attendees’– This is the endpoint for the REST API. Make sure to replace “your.site” with your site’s actual URL. The rest of the endpoint is pointing to the Event Tickets API for attendees.beforeSend: function (xhr)– This function is used to add headers to the AJAX request. In this case, we are adding an authentication token (nonce) to the request, which is necessary to validate that the user making the request has the right permissions to create an attendee. Make sure you update the localized variable name (ajax_variable.nonce) if you used something different.data: {…}– This is the body of the request, where you send the actual information needed to create the new attendee. Each key in the object corresponds to a required parameter expected by the API. There are other attendee-specific parameters you can optionally add, but these three are required:ticket_id: ‘50’– Theticket_idis a string or integer that must correspond to thepost_idof an existing ticket in your system. The attendee you’re creating will be associated with this ticket. Without a validticket_id, the request will fail.full_name: ‘Bob Saget’– This is the name of the attendee you’re creating. It will appear in the list of attendees associated with the event.email: ‘[email protected]’– This is the attendee’s email address. Make sure this is a valid email, as it will be used for communication and sending the tickets, which you will have to either send manually on the attendee page or through a different customization.
Update an Existing Attendee
The process for updating an attendee is very similar to creating a new attendee with two key differences: the request type is a PUT request (instead of a POST request), and you have to identify which attendee you want to update in the REST API.
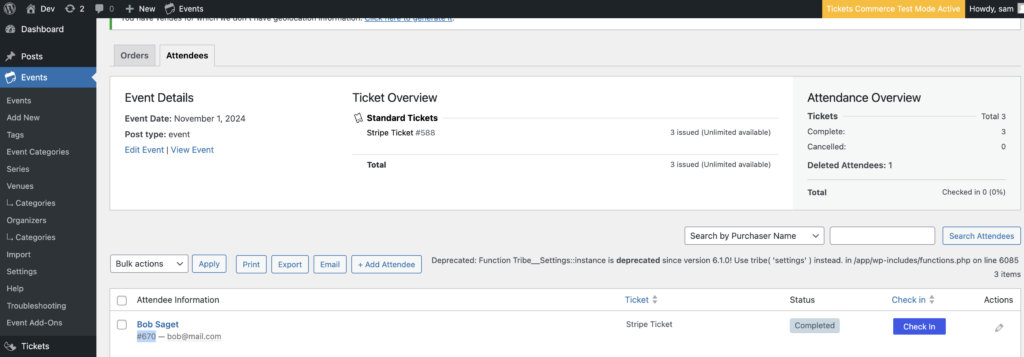
To find the id of a given attendee, you can either use a REST API GET request, or go to the Attendee Page and find the attendee you want to update and their id will be the number under their name:
This is what the AJAX call looks like with those adjustments:
$.ajax( {
		method: 'PUT', // For updating existing item in database
		url: 'https://your-site/wp-json/tribe/tickets/v1/attendees/670', // Add the id of the attendee
		beforeSend: function ( xhr ) {
			xhr.setRequestHeader( 'X-WP-Nonce', ajax_variable.nonce );
		},
		data: {
			ticket_id: '50',
			full_name: 'Updated Name',
			email: '[email protected]',
		}
	} )
} );