If you’re offering tickets for an event with limited venue seating, like a theater or seated banquet, and want to let attendees select their own seats in advance, we’re thrilled to announce that this feature is now available with our Seating add-on for Event Tickets!
The first step is to create Seating Maps and Seat Layouts to define your seating configuration. After that, you’ll be able to create assigned seating tickets. This article focuses on creating and managing Seating Maps and Seat Layouts.
Introduction to Maps and Layouts
What’s the difference between a Map and a Layout?
- The Seating Map is the physical configuration of your seats and defines the total number of seats. Usually, you will only have one map per venue, but you can create as many maps as you need.
- The Seat Layout uses a map as a template, but includes options to define specific Seat Types. These Seat Types can be linked to tickets, enabling buyers to select from the designated seats.
Here’s an example:
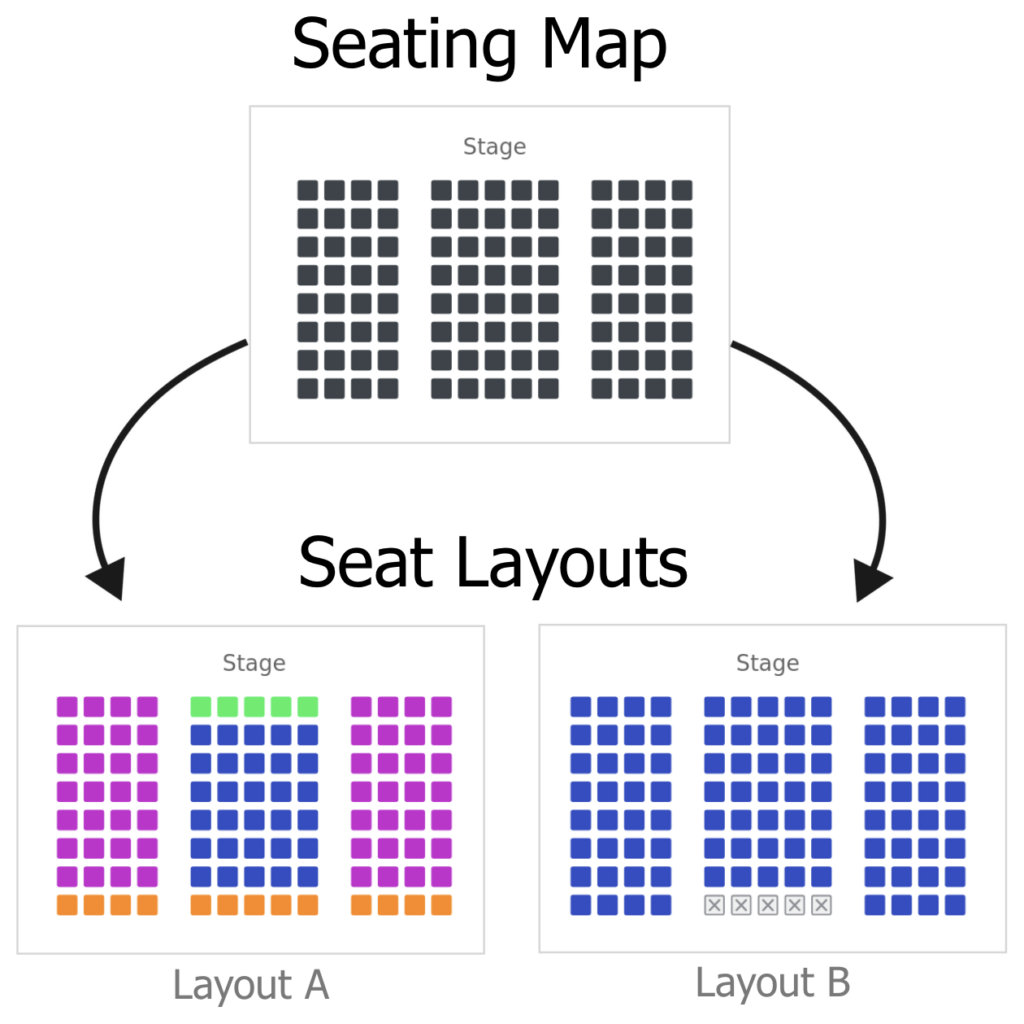
A theater manager creates a Seating Map with 100 seats and two aisles down the middle. They create a Seat Layout (Layout A, below) with seat types such as Side Seats, Center Seats, VIP (for the front center seats), and Discount Seats (for the back row of all three sections). By using this layout for an event, they can price tickets according to the seat quality.
They then create another Seat Layout (Layout B, below) from that same map where all of the available seats belong to the same seat type, General Admission. They can create tickets at different prices for Adult, Child, and Senior attendees, allowing them to choose any available seats on the map. The layout also includes blocked seats to accommodate space for the sound engineers.
Creating a Seating Map
You can create and edit your Seating Maps by going to Tickets > Seating in your WordPress dashboard. Any existing maps will be displayed there.
To create a new map, click Add New. This will open the New Seating Map screen. Give your map a name, and then you can define the size and shape by setting the Rows and Seats per row. To make a shape other than a square or rectangle, click individual seats to hide them. These hidden seats will not show at all on the layout your customers see, and hidden seats do not have seat numbers.
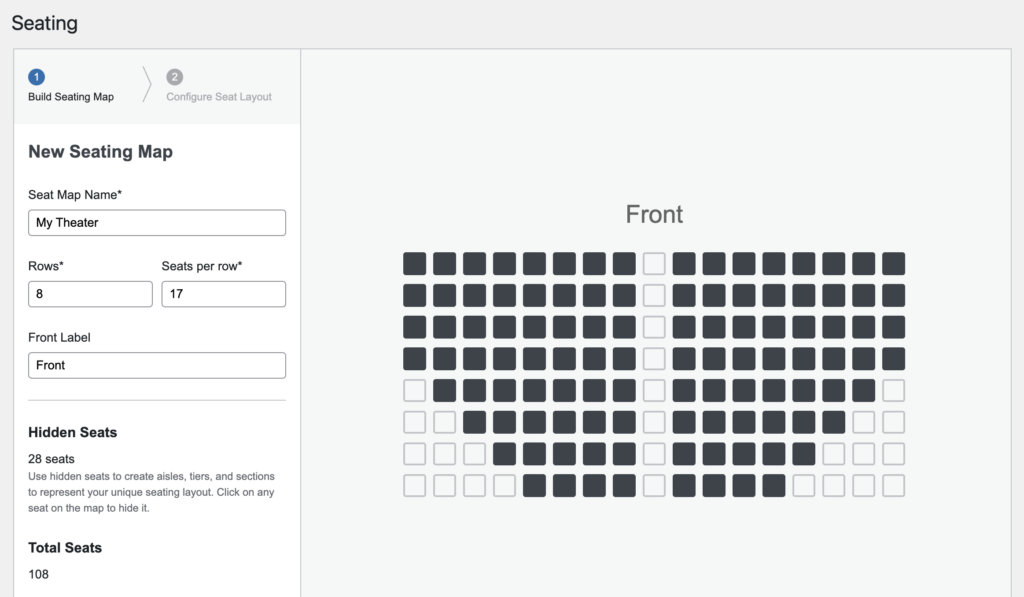
When you’re happy with your map, click the Configure Layout button.
Creating a Seat Layout
There are four ways to create a Seat Layouts:
- When creating a new Seating Map, click Configure Layout to go directly to the New Seat Layout creator to make a layout based on that map
- From the Seating Maps tab, click Create Layout on a specific map to create a layout based on that map
- Click Add New from the Seat Layouts tab and select which of your maps to use
- Click Duplicate on any existing Layout on the Seat Layouts tab
The main part of creating a Seat Layout is defining your Seat Types. Seat Types can be linked to specific event tickets, which lets your set different pricing for each type of seat (read more about creating seated tickets here).
Seat Types
By default, all of the seats on a new layout are assigned to the same Seat Type called General Admission. You can edit that Seat Type with a new name, or start making new Seat Types to suit your needs. Remember, you can create different Seat Layouts from the same map.
You can create a new Seat Type by clicking the + Add Seat Type link. Choose a name and color for your Seat Type, and add a description if you want. The name and description are only for your reference, and will not be displayed to your customers.
When you save the Seat Type, you’ll immediately be in seat selection mode. Click any seat on the layout to set it to that Seat Type.
You can create as many Seat Types as you need. You can enter seat selection mode for any type by clicking the cursor button.
Blocked Seats
In addition to designating seats to specific Seat Types, you can also set a seat as Blocked. Unlike hidden seats, Blocked seats will show on the frontend layout and have their own seat number, but they cannot be purchased or assigned to an attendee. Blocked seats might be useful if you need to set aside space for audio equipment or performers, or if a seat is temporarily unusable.
To block a seat, click the cursor button next Blocked in the sidebar. Select the seats you want to block and save.
Editing Maps
When a Seating Map has associated layouts, any edits made to the map will be saved as a new Seating Map (e.g. Save As). The original map will be preserved, and changes you make will not impact existing layouts. Similarly, you can only delete a map if it has no associated layouts.
Editing Layouts
You can edit any existing Seat Layout by clicking the Edit button from the Seat Layouts tab. You can make changes to Seat Types and block or unblock seats. Keep in mind that changes made to a layout will impact any events that are using that layout. This can be useful, but can also have significant effect on tickets, attendees, and seat assignments.
Editing a Seat Layout with associated events
If you need to edit a Seat Layout that has events associated with it, there are a couple of important things to keep in mind.
Edits will impact all events that are using this layout
If you need to make layout changes for some of those events (say, only the ones happening tomorrow) then you might want to create a new layout instead. See Changing the event’s Seat Layout.
Changing Seat Types does not impact existing attendees
Even if you change the Seat Type of a reserved seat, the attendee will still have the original seat assignment. If you remove a Seat Type, any designated seats are automatically set to a different existing Seat Type.
Blocking a reserved seat will cause attendee(s) to lose their seat assignment
If you’re blocking seats, you will probably want to review seat assignments for all events associated with that layout. If you previously had attendees in those seats, they’ll need to be reassigned to a different seat. If you block a seat that is currently in a customer’s cart, it may cause problems when they checkout.
Editing Seat Types can impact tickets and event capacity
If you remove a Seat Type that was linked to a ticket on any event, that ticket will be linked to a different Seat Type on the same layout. Changing the number of seats in a given Seat Type can impact ticket capacity and availability, depending on the existing sales and attendees.
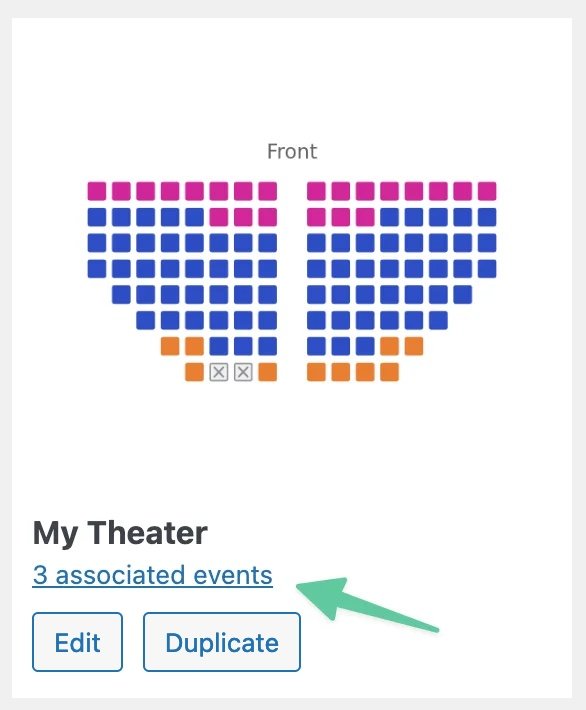
❗We highly recommend that you review a layout’s associated events, especially any that are upcoming, before making changes. After you make changes, go back and review the ticket configuration and Seats tab for each event.
Click the associated events link to view a list of relevant events.
Changing the Event’s Seat Layout
Once you’ve added a ticket with assigned seating to an event, the linked Seat Layout will show in the Ticket Settings.
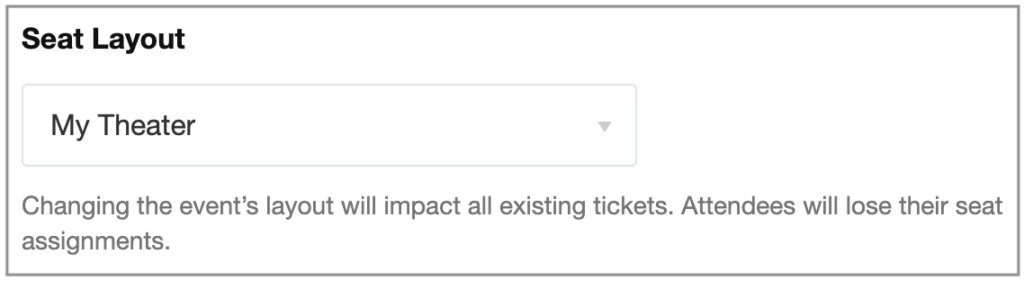
If necessary, you can change the Seat Layout of an event. However, it will have significant impacts on your event:
- All existing attendees will lose their seat assignments, and you will need to manually reassign seats using the new layout
- All existing tickets will be reassigned to the first Seat Type of the new layout
Since all existing attendees will lose their seat assignments, we highly recommend exporting the attendee list from the Attendees tab before you make changes in order to keep a record of the previous seat assignments.
Once you’ve created your Seating Maps and Seat Layouts, you’re ready to start creating tickets with assigned seating!