Just starting out with automations? Check out the steps below to help you get set up. We’ll walk through how to integrate with Zapier and Microsoft Power Automate so that you can connect your third-party apps, making automation a breeze.
Follow the links in the article for more information on each topic.
Installation
- Make sure you have a WordPress website already set up.
- Ensure your WordPress site operates with a valid SSL certificate (HTTPS).
- Log in as an admin.
- Install and activate
- The Events Calendar and The Events Calendar PRO for event-related automations.
- Event Tickets and Event Tickets Plus for ticket/RSVP-related automations.
Configuration
In this article:
Zapier configuration
Next, configure the plugin so you can add the Zapier integration.
Important: We recommend generating an API key for each of our Zapier applications (i.e.: 1 key for The Events Calendar and 1 key for Event Tickets)
Follow these steps to make that happen:
- Head over to Events or Tickets > Settings > Integrations
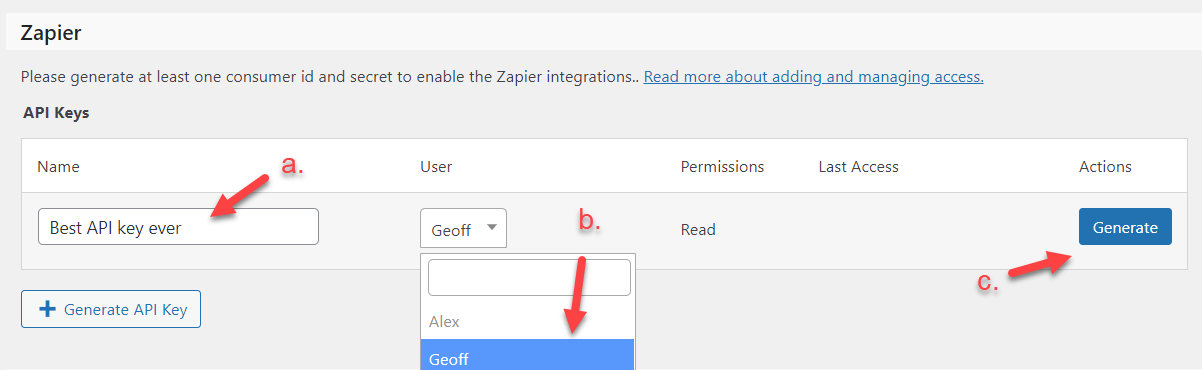
- Find the Zapier Section
- Enter a description for the API key (optional).
- Select the desired WordPress user (defaults to logged-in user).
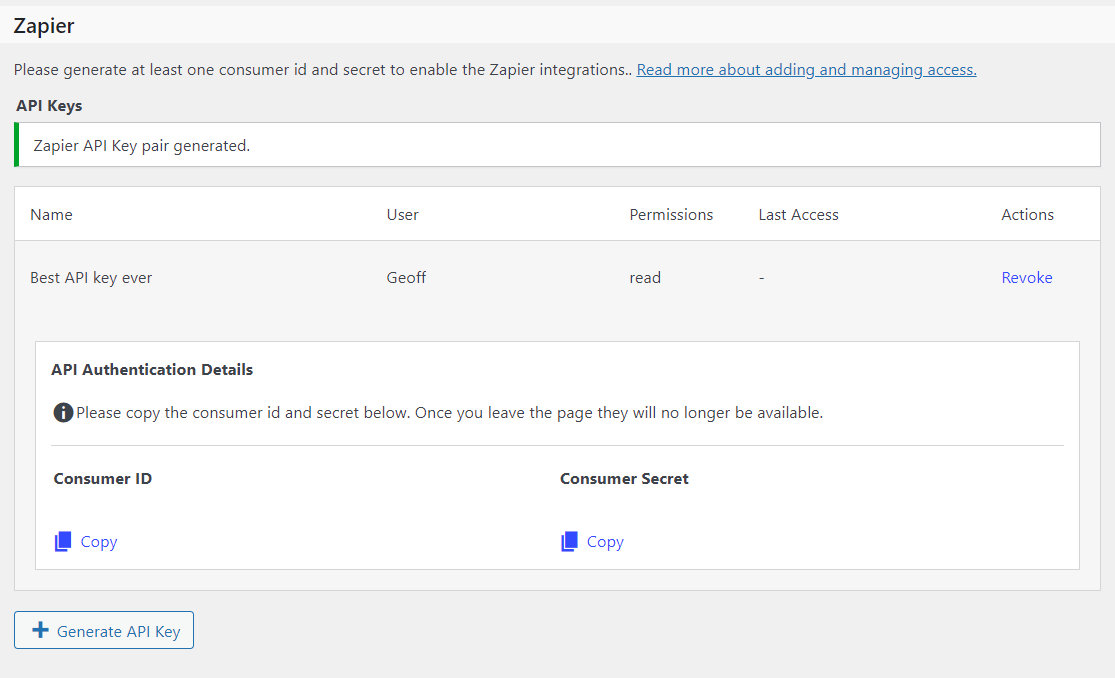
- Click on the Generate button.
Note: The Consumer ID and Consumer Secret will only be displayed immediately after they are generated. Please make sure you have copied them somewhere safe before moving on.
Next, head over to Zapier to configure settings there.
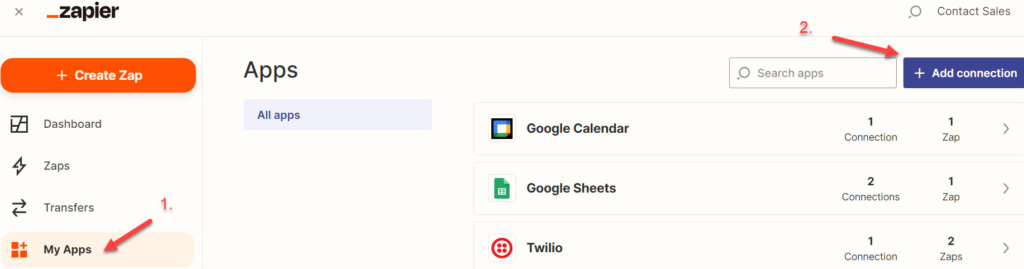
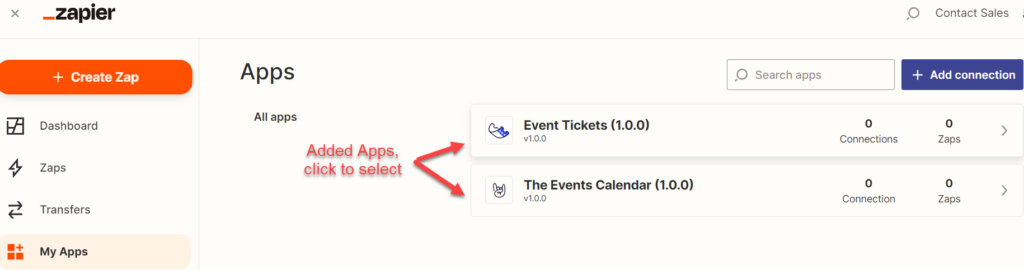
- While logged into Zapier, click on My Apps.
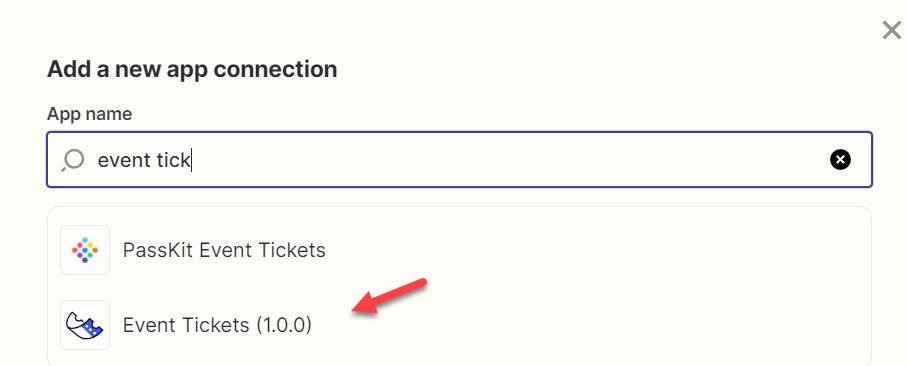
- Click on Add Connection to search for The Events Calendar or Event Tickets apps and add them to your app list.
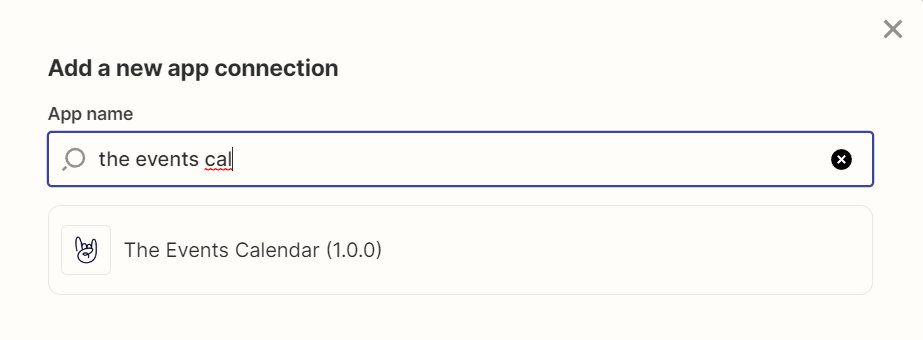
Once the apps are added, for each app:
- Select the app.
- Click on + Add connection.
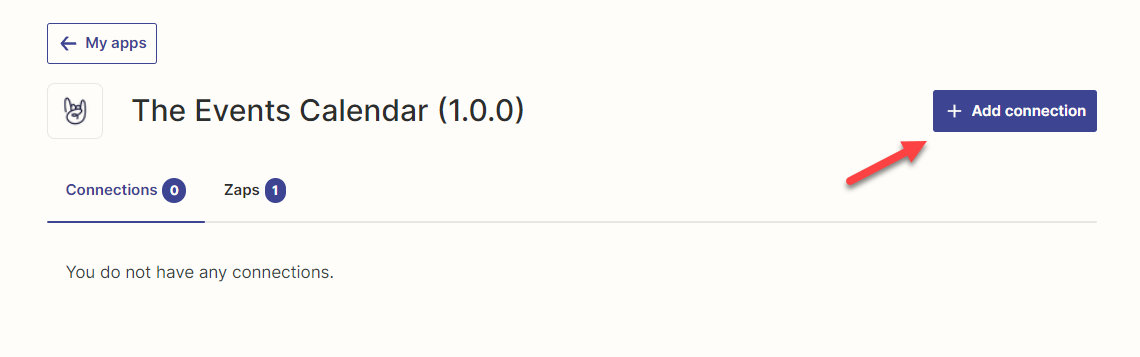
- You will see a pop-up appear.
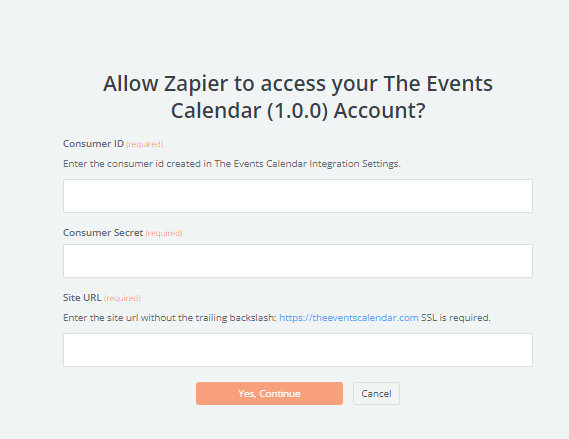
Head back to the Zapier section of your Integrations tab in WordPress.
- Copy the Consumer ID and paste it into the Consumer ID field in the pop-up.
- Copy the Consumer Secret and paste it into the Consumer ID field in the pop-up.
- Copy the site URL without the trailing backslash.
Click on the Yes, Continue button.
Your app is now connected to Zapier! You’re ready to create Zaps.
Pro Tips:
- You will need to repeat this process for The Events Calendar App and the Event Tickets app.
- We recommend creating a separate API key for The Events Calendar and Event Tickets apps (each has its own Consumer Secret and Consumer ID).
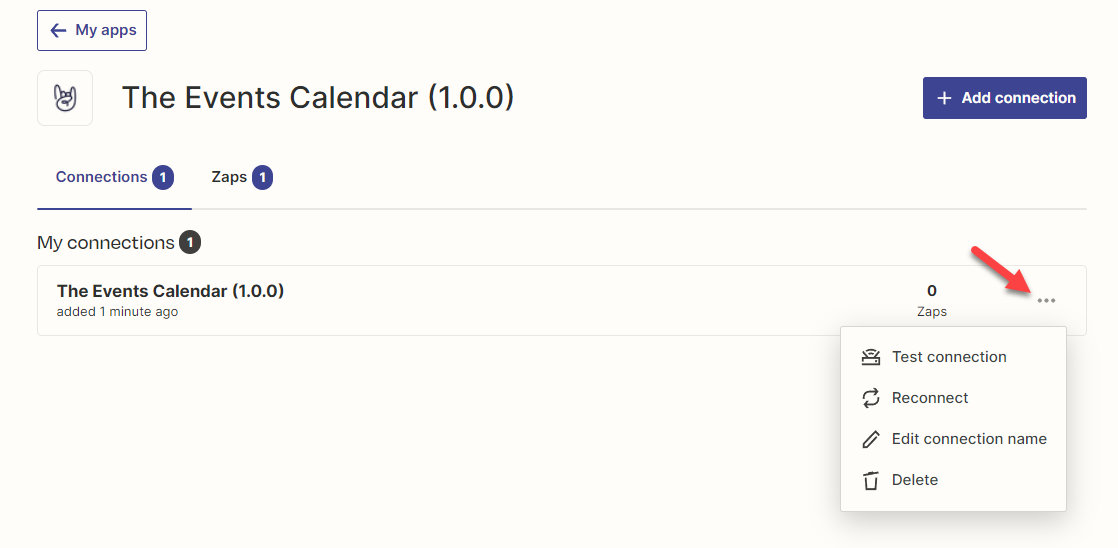
Bonus: Check out the dotted menu in each app to manage your connection (i.e. test, reconnect, rename, delete).
First time using Zapier? Zapier University is a great place to get started and get up to speed on all things Zapier.
The Challenge: “Authentication Failed: Unable to Verify the First Certificate”
If you encounter the following error when trying to establish a connection to your WordPress site, follow these steps to resolve the issue.
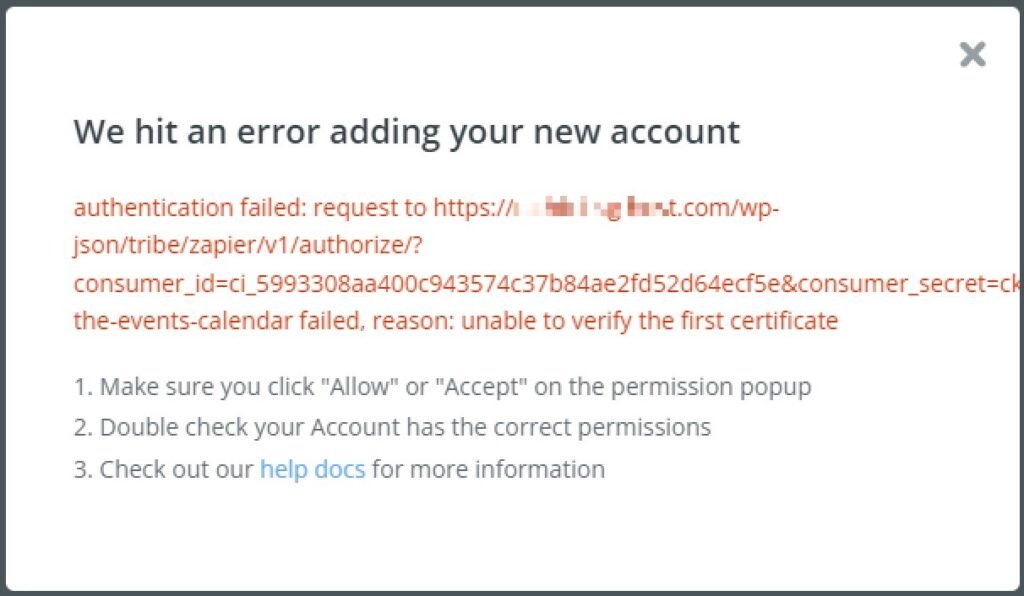
This issue typically occurs when your web host provides an SSL certificate that is not globally trusted. As a result, Zapier or other external services are unable to verify the certificate, preventing a secure connection to your website.
To determine if your SSL certificate is the cause of the problem, use an online SSL checker tool like SSL Shopper. Simply enter your website URL and review the results for any errors or warnings.
If the SSL certificate is not globally trusted, contact your hosting provider and inform them of the issue. They should be able to replace it with a trusted SSL certificate issued by a recognized Certificate Authority (CA) such as Let’s Encrypt, DigiCert, or GlobalSign.
After the new SSL certificate is installed, use the SSL Shopper tool again to confirm that it is correctly configured and globally recognized. Ensure that there are no security warnings or verification failures.
Once the SSL certificate is validated, try reconnecting Zapier to your WordPress site. This should resolve the authentication error and restore secure communication between Zapier and your website. If the issue persists, consider clearing your site’s SSL cache or restarting your web server before attempting the connection again.
Power Automate configuration
Let’s configure the plugin so that you can connect your site to Power Automate.
- Head over to Events or Tickets > Settings > Integrations
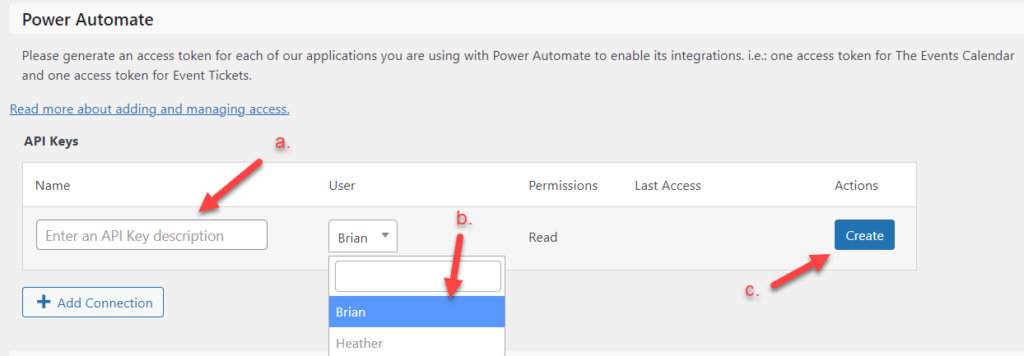
- Find the Power Automate Section
- Enter a description for the API key (optional, but recommended).
- Select the desired WordPress user (the user must be an admin to be selectable).
- Click on the Create button.
Note: The Access Token will only display immediately after they are generated. Please make sure you have copied it somewhere safe before moving on.
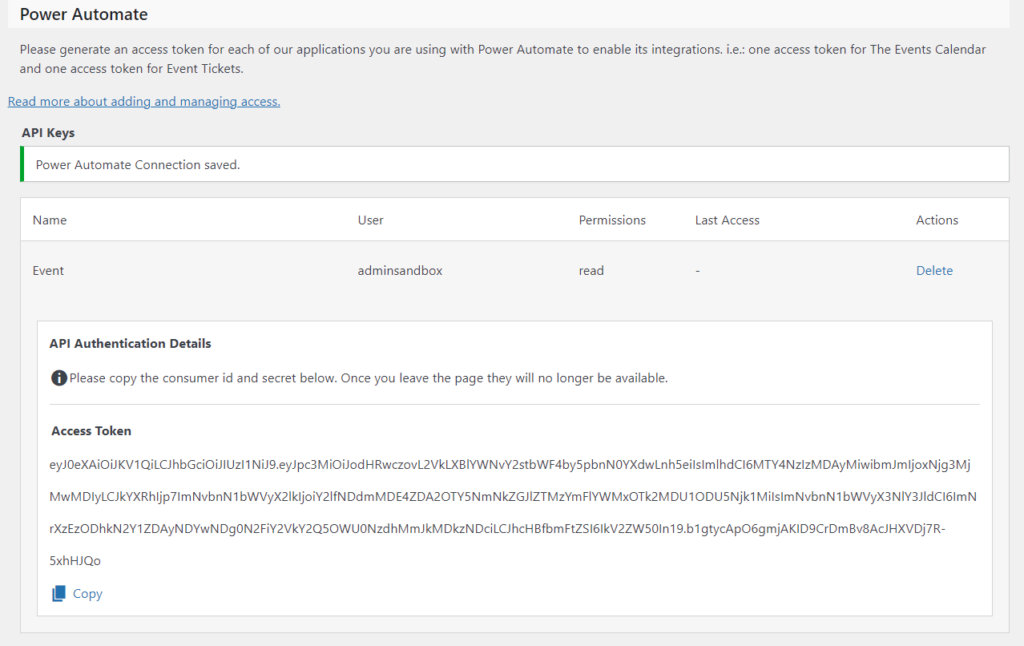
Copy the access token.
Next, head over to Power Automate to connect your site.
- While logged into Power Automate, click on Connectors.
- Search for The Events Calendar and the Event Tickets connectors
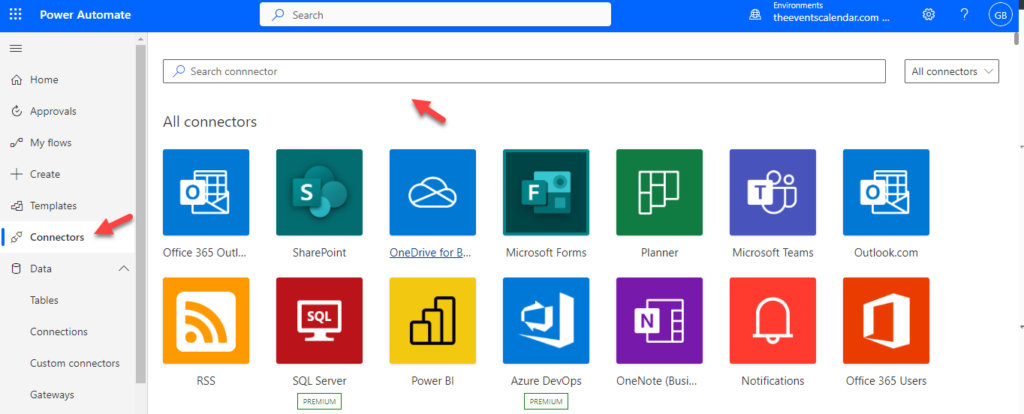
- Add both to your Connections list, one at a time.
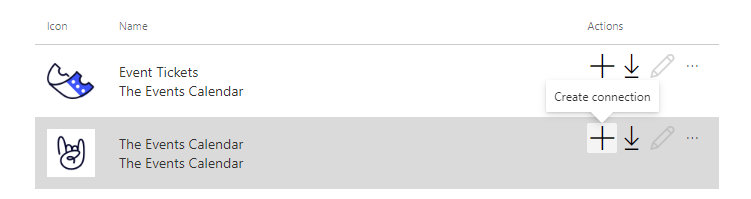
- Click on the big “+”, which will pop up the Create connection box, for The Events Calendar connector:
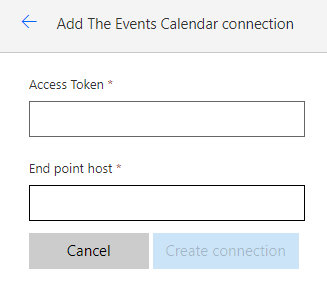
- You will see a connection set-up screen appear:
Head back to the Power Automate section of your Integrations tab in The Events Calendar
- Access token
- If you have not copied the access token, copy it from your Events > Settings > Integrations (see above ⬆️)
- Paste the access token into the Access Token field
- End point host
- Your End point host is your TEC site URL without the “https://” part
- i.e.: https://uper-stoat-vizu.instawp.xyz/ becomes uper-stoat-vizu.instawp.xyz
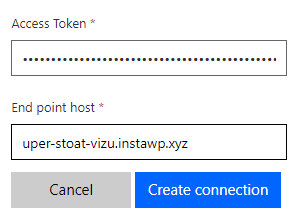
Click on the Create connection button.
Your site is now connected to Power Automate’s The Events Calendar connector. Well played. Yes!
But wait, you are not done. Now you need to connect your site to Power Automate’s Event Tickets connector 🙂 .
You can now generate a new dedicated access token and repeat the whole process for the Event Tickets connector.
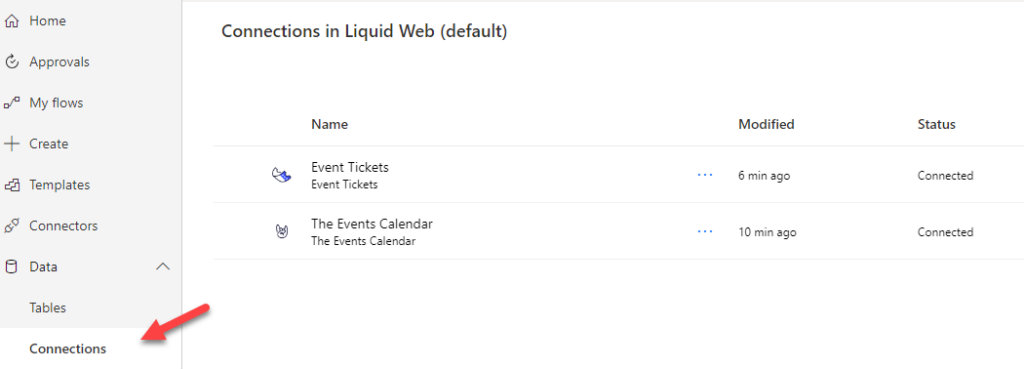
Once your site is connected to Power Automate and both connectors are added, they will appear under Data > Connections in its UI
First time using Microsoft Power Automate? Microsoft Power Automate documentation’s page is a great place to get started and go through its different learning paths.