Avada is an extremely popular WordPress theme and page builder. It also integrates nicely with The Events Calendar, but there are a few things you can do to make your calendar and the theme work more seamlessly together.
/events , and can be changed in the plugin settings.What You Need
- Avada: The core theme for the Avada product suite. It requires Avada Core and Avada Builder, which are bundled with the theme purchase.
- The Events Calendar: The core plugin for calendar functionality.
- The Events Calendar Pro (optional): Additional calendar features and views.
- Event Tickets (optional): The core plugin for creating tickets for events.
Installation
Download and install the theme and plugins as you would others in WordPress or via FTP. Avada requires two plugins in addition to the theme, which enable the page builder and other features. Instructions for installing those plugins are provided below.
Setup
The next thing is to configure your calendar. The Events Calendar provides a lot of flexibility to customize your views and events, and Avada adds even more settings that help the calendar and theme work even more seamlessly together.
Using Avada Pre-Built Website Designs
Avada provides a number of pre-built, pre-designed sets of pages that are perfect starter templates for crafting a visually appealing website with a consistent look and feel throughout.
Three of the pre-built websites feature The Events Calendar:

Avada Church

Avada Beer

Avada University
You can use any of the websites by navigating to Avada → Websites from the WordPress dashboard.
Page Title Bar Settings
Navigate to Avada → Global Options from the WordPress dashboard to access Avada customization settings. This is where you change the appearance of your site at the theme level. In particular, there is a setting to pay extra attention to when integrating with The Events Calendar.
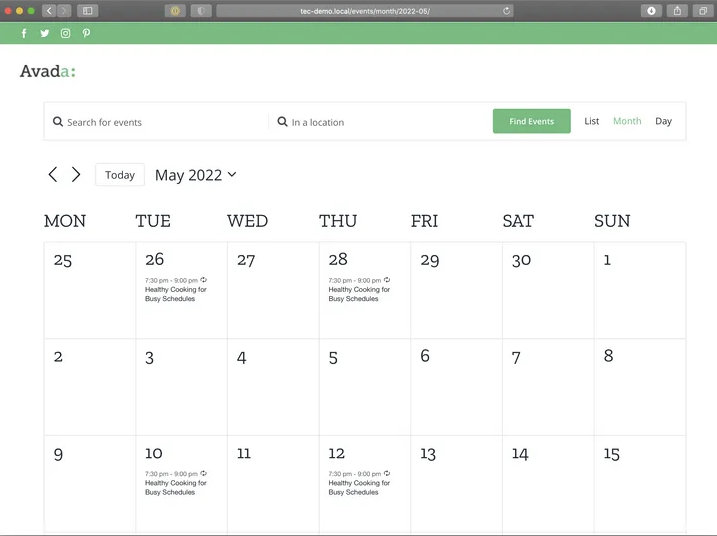
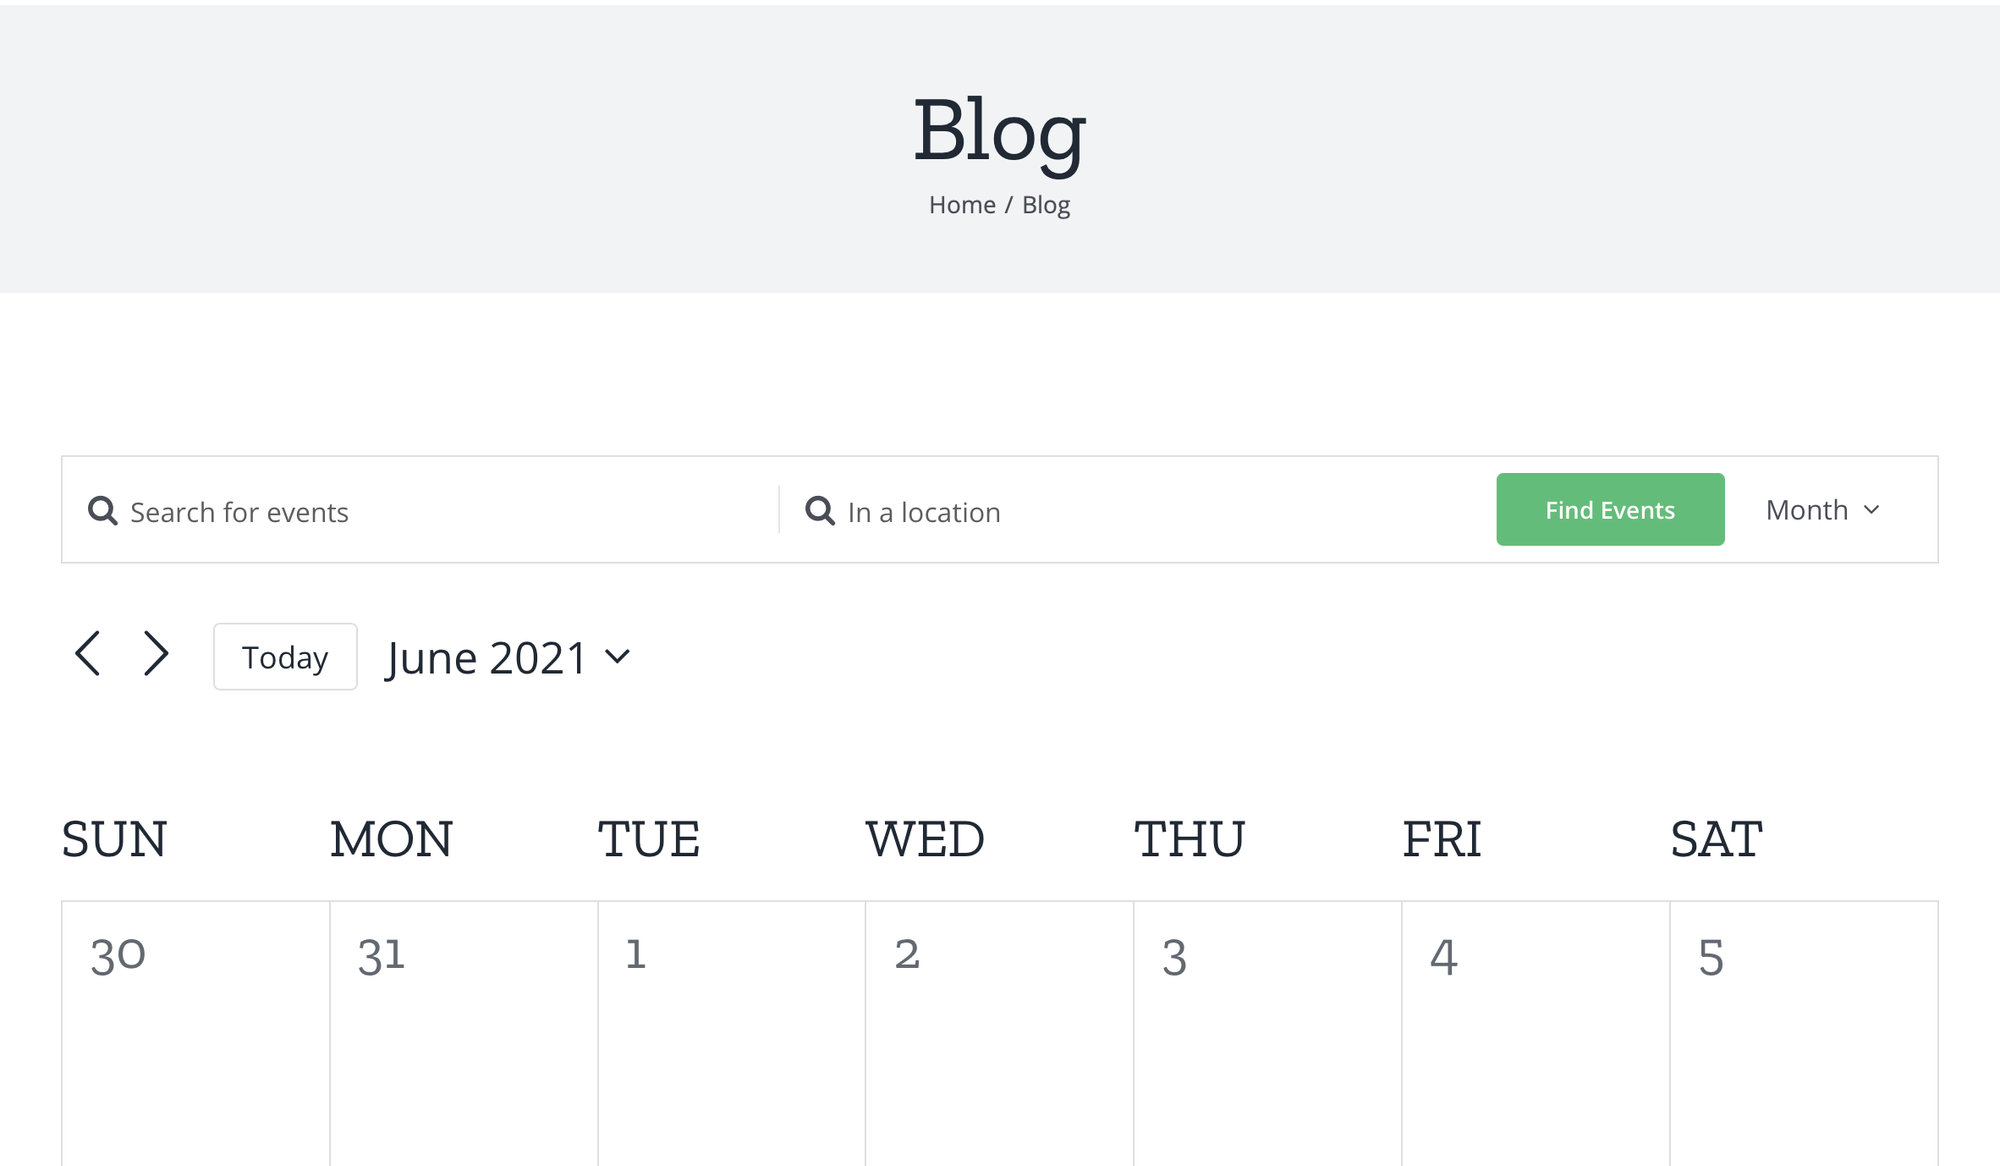
Open the Page Title Bar settings. If your calendar is set as the front page of your site (Settings → Reading), an incorrect page title and breadcrumbs may appear above the calendar. This occurs because the calendar uses a custom post type archive template, which the Avada theme mistakenly identifies as the main blog archive when the calendar is set as the front page. This page title bar issue only arises when the calendar is used as the front page; in all other cases, it displays correctly.
How to Fix the Incorrect Page Title
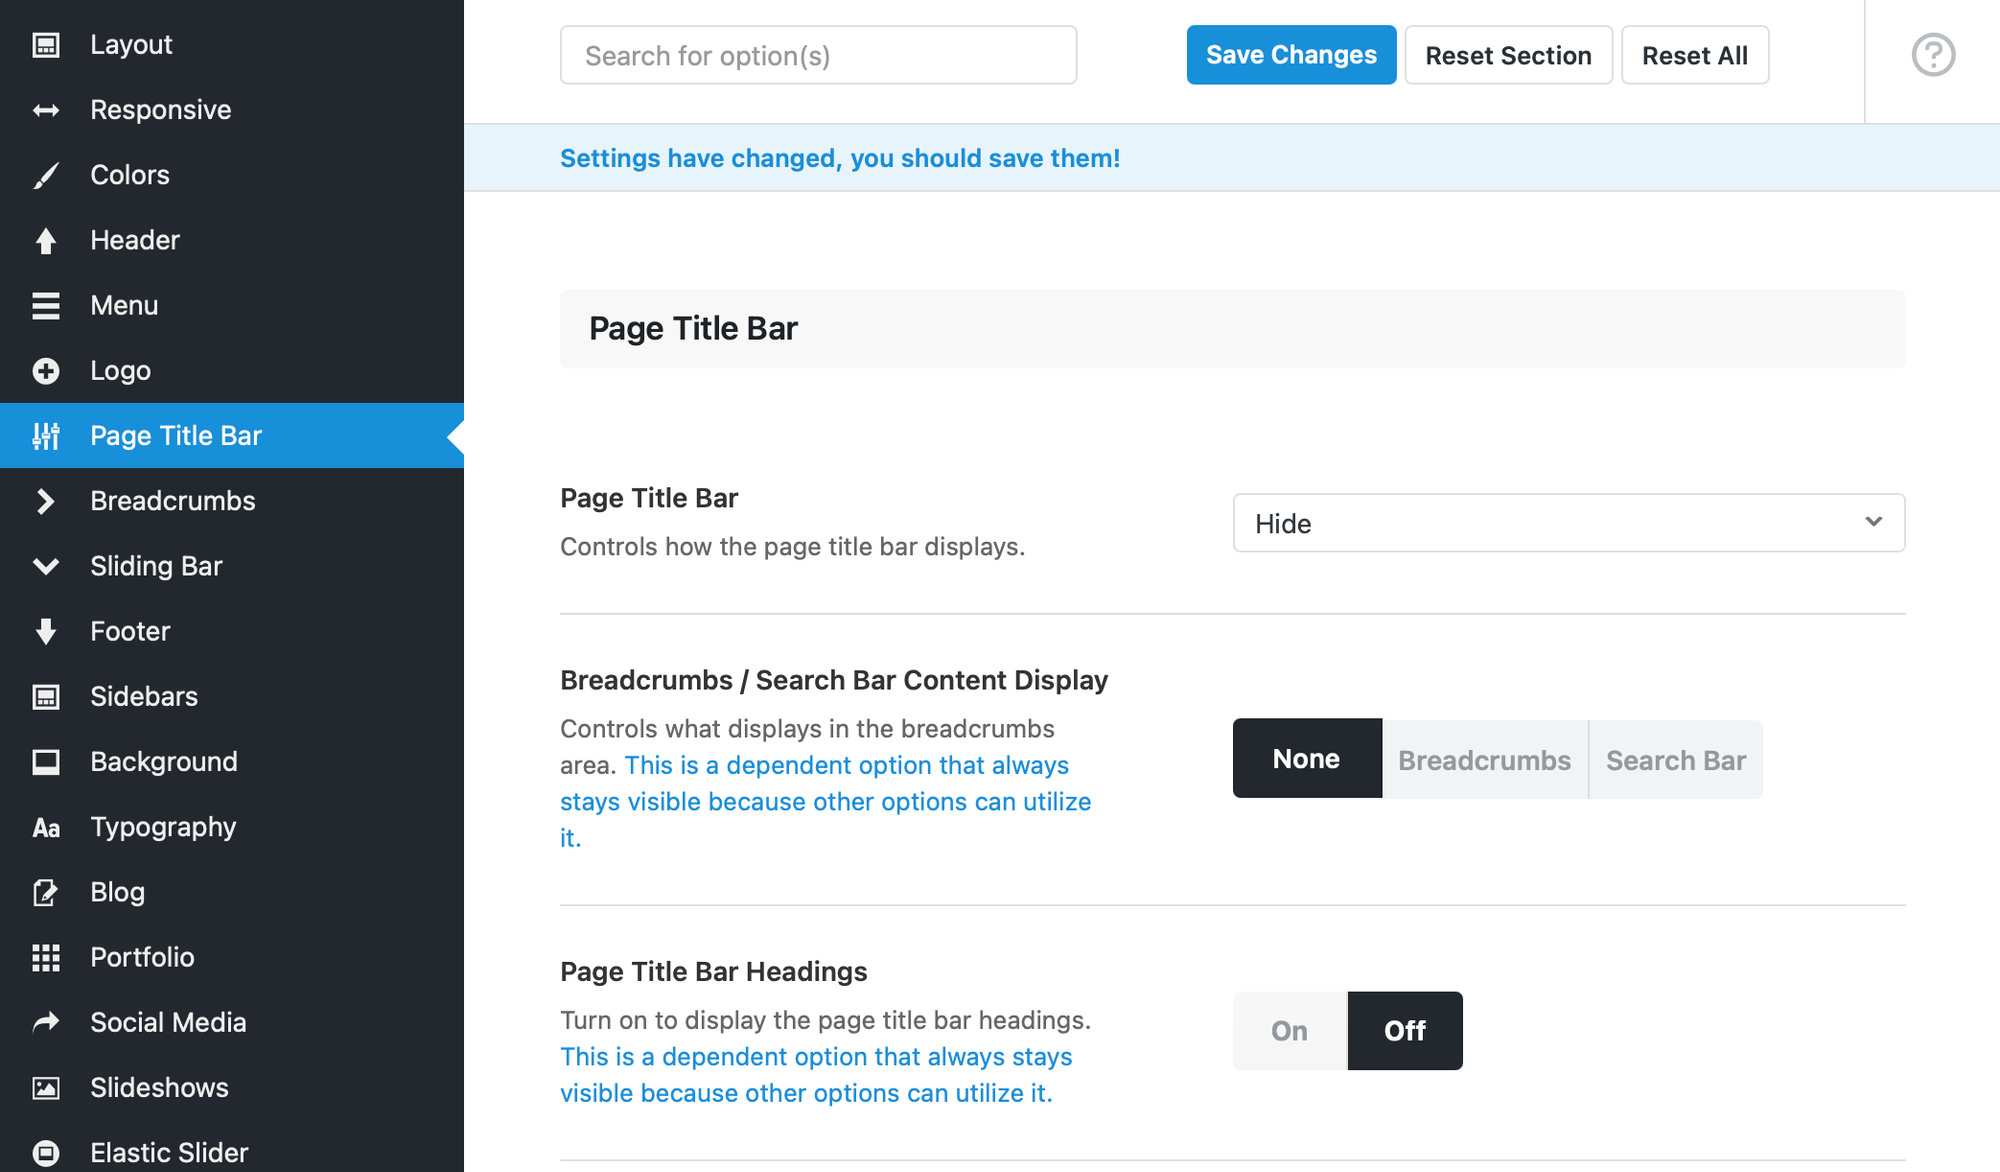
The simplest approach is to hide the page title and breadcrumbs in the Avada Page Title Bar settings:
- Go to the Page Title Bar settings and select “Hide” to remove the incorrect page title.
- Set the Breadcrumbs option to “None” to remove the breadcrumbs.
Note: This solution will leave an empty header space on the calendar page, and it applies globally across the site, removing the page title from all pages.
If you’d like to remove the header space only on the calendar page, you can add a custom CSS snippet:
- Go to Appearance → Customize → Additional CSS in WordPress, or use Avada’s custom CSS section under Avada→Options→Custom CSS
- Add this CSS snippet to hide the header on the calendar page specifically.
.fusion-page-title-bar {
  display: none;
}
Another option? If you have Events Calendar Pro, you can use a shortcode to embed the calendar on a different page:
- Create a new page in WordPress.
- Use the Events Calendar shortcode to embed the calendar on this page.
- Set the new page as your main events calendar.
Customizing Calendar Appearance
Avada devotes an entire section of its Global Options settings to The Events Calendar. Access it by navigating to Avada → Options from the WordPress dashboard, then click on the “Events Calendar” option in the navigation.
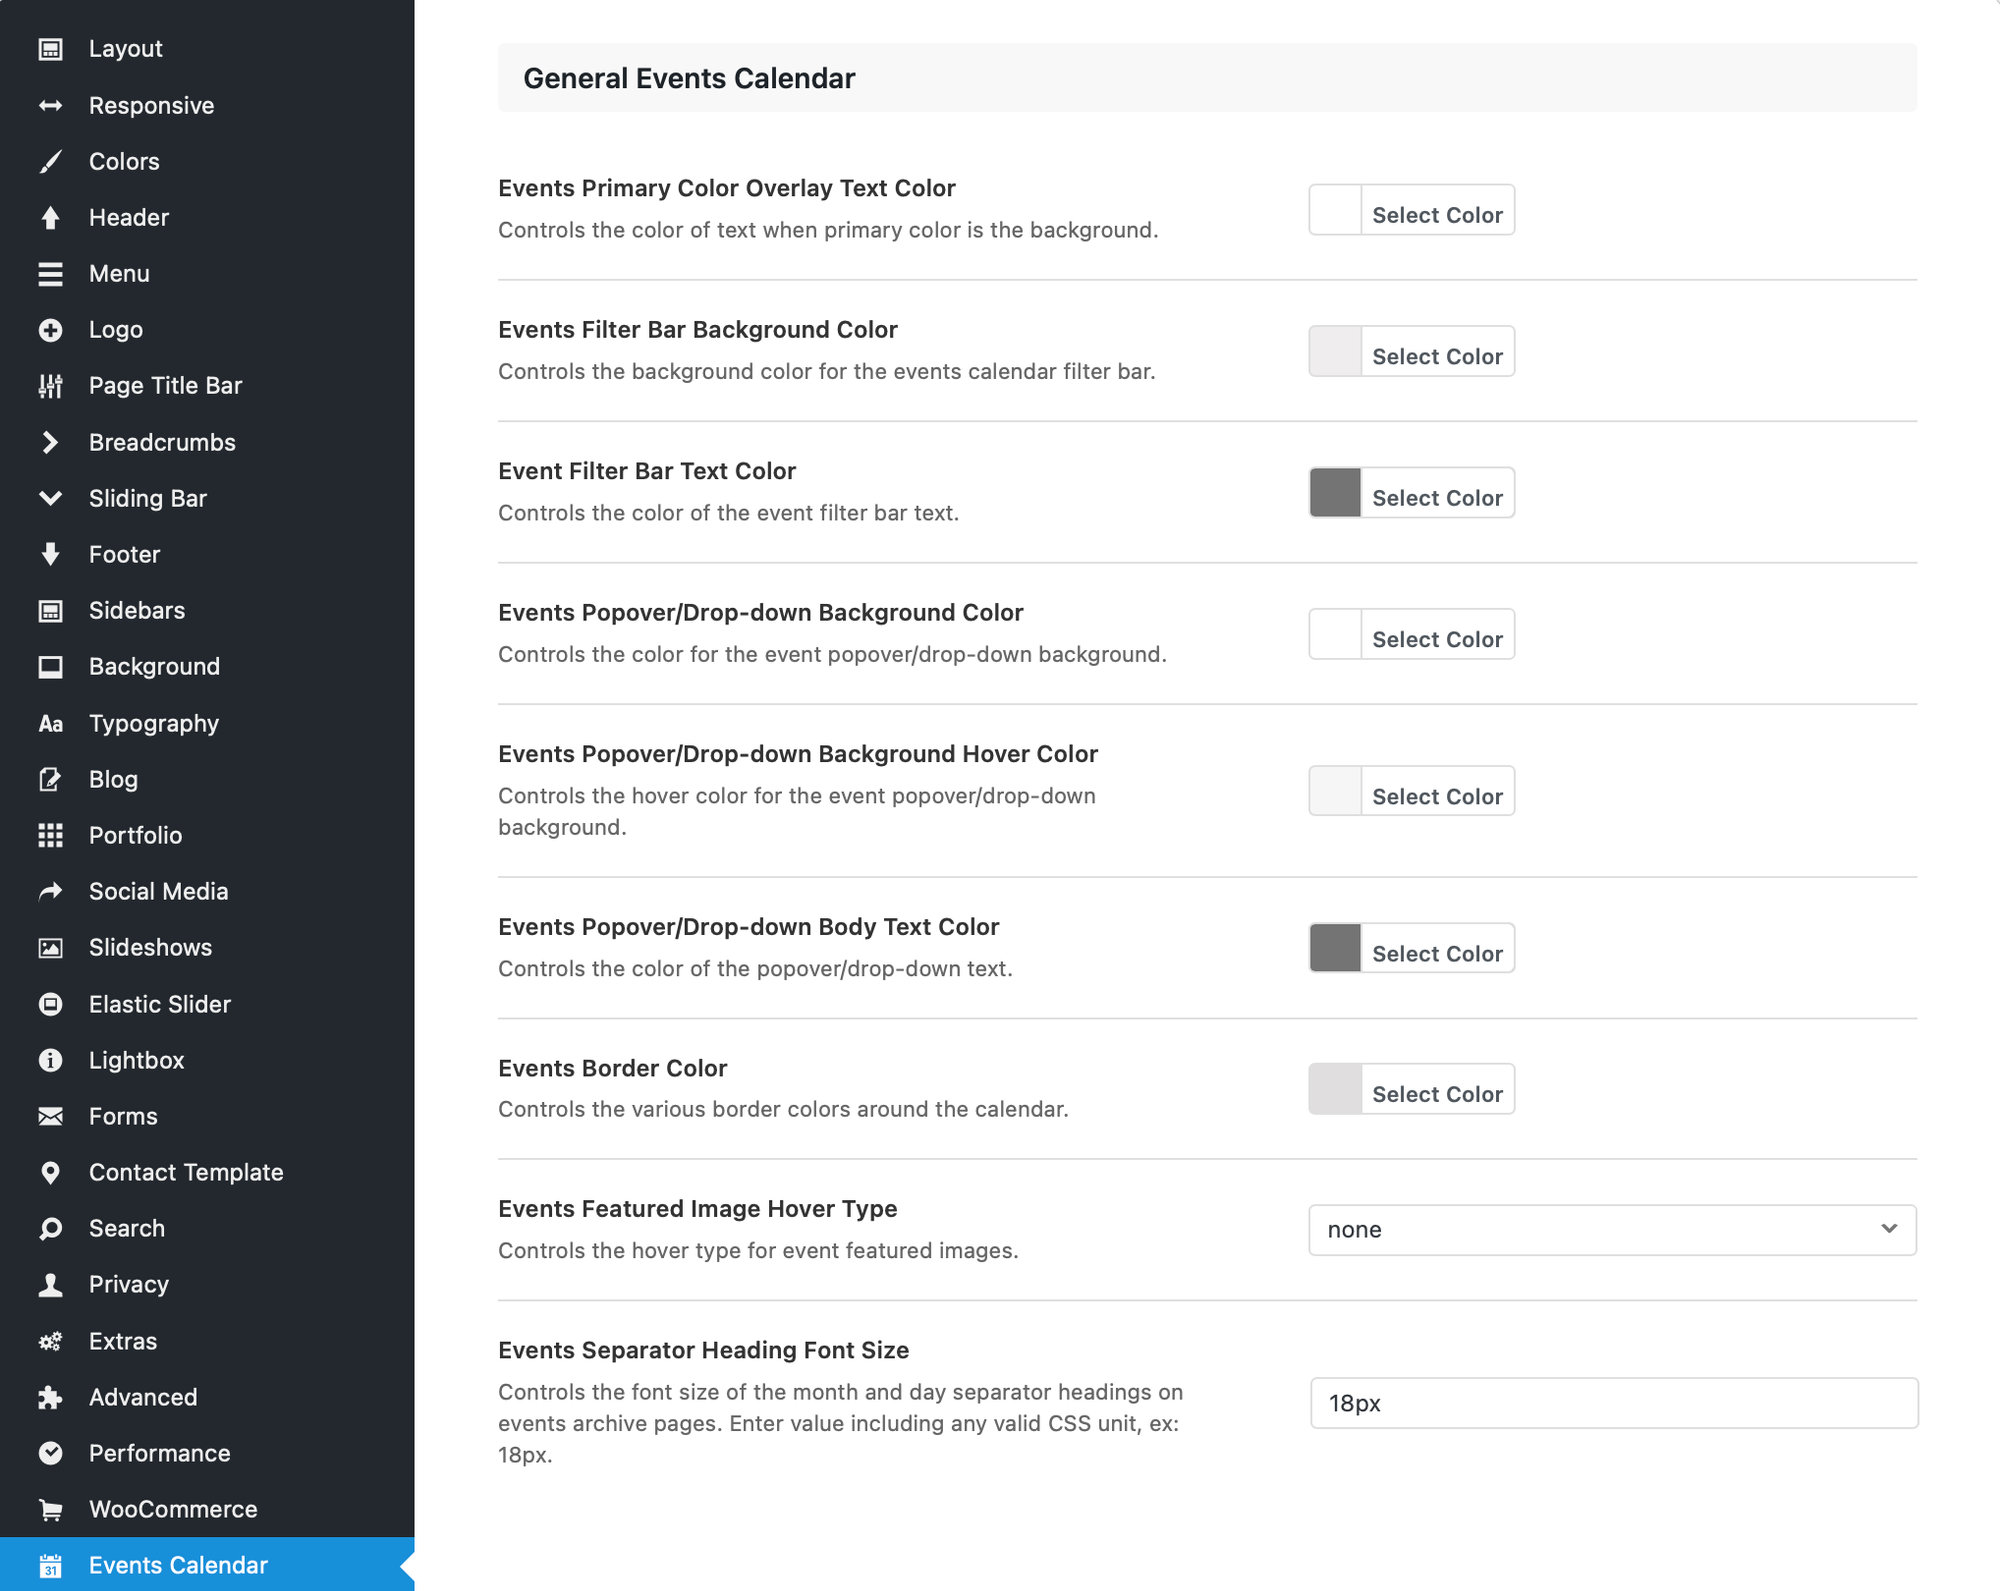
There are many settings available to customize your calendar directly from this screen, including the following:
- Events Primary Color Overlay Text Color: Controls the color of the text when the primary color is the background.
- Events Filter Bar Background Color: Controls the background color for the events calendar filter bar, when the Filter Bar premium add-on is installed.
- Event Filter Bar Text Color: Controls the color of the event filter bar text when the Filter Bar premium add-on is installed.
- Events Popover/Drop-down Background Color: Controls the color for the event popover/drop-down background in the calendar’s month and week views.
- Events Popover/Drop-down Background Hover Color: Controls the hover color for the event popover/drop-down background in the calendar’s month and week views.
- Events Popover/Drop-down Body Text Color: Controls the color of the popover/drop-down text in the calendar’s month and week views.
- Events Border Color: Controls the various border colors around the calendar.
- Events Featured Image Hover Type: Controls the hover type for event featured images.
- Events Separator Heading Font Size: Controls the font size of the month and day separator headings on events archive pages. Enter value including any valid CSS unit (e.g. 18px).
Single Event Display Settings
The settings to customize event pages are directly beneath the “General Events Calendar” options. Use these settings to adjust the appearance of the template that displays individual events.
The settings are divided into four subsections to modify specific aspects of the design.
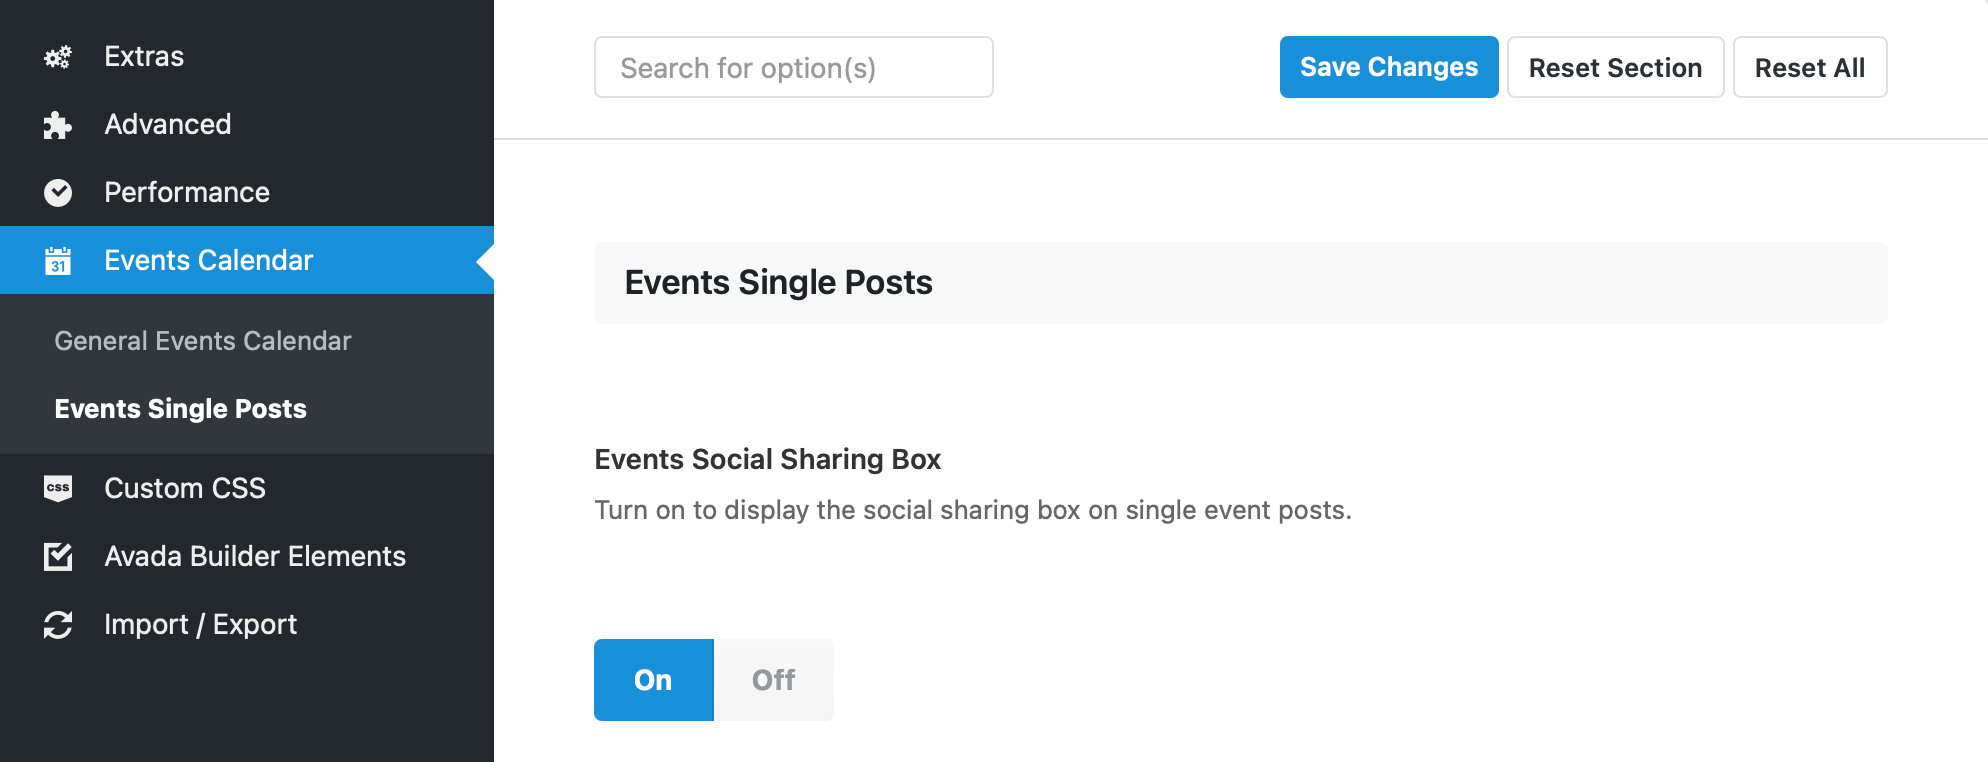
Event Single Posts
- Events Social Sharing Box: Turn on to display the social sharing box on single event posts.
- Events Single Post Meta Layout: Sets the layout of the single events meta data.
Event Single Sidebar Layout
Events Single Sidebar Width: Controls the width of the sidebar when only one sidebar is present. Enter value including any valid CSS unit (e.g. 32%).
Events Dual Sidebar Layout
The following settings help adjust event pages that contain two sidebars in the page layout.
- Events Dual Sidebar Width 1: Controls the width of sidebar 1 when dual sidebars are present. Enter value including any valid CSS unit (e.g. 21%).
- Events Dual Sidebar Width 2: Controls the width of sidebar 2 when dual sidebars are present. Enter value including any valid CSS unit (e.g. 21%).
Events Single Post Sidebar / Meta Content Styling
These settings control the appearance of the sidebar that contains meta information about the event.
- Events Sidebar / Meta Content Background Color: Controls the background color of the single event post sidebar / meta content.
- Events Sidebar / Meta Content Padding: Controls the padding for the single event post sidebar(s) / meta content. Enter value including any valid CSS unit number (e.g. 4%).
- Events Sidebar Widget / Meta Content Heading Font Size: Controls the size of the sidebar widget / meta content heading for single event posts. Enter value including CSS unit (in px, em, rem).
- Events Sidebar Widget / Meta Content Title Background Color: Controls the background color of the sidebar widget/meta content title for single event posts.
- Events Sidebar Widget / Meta Content Headings Color: Controls the color of the sidebar widget / meta content heading for single event posts.
- Events Sidebar / Meta Content Text Font Size: Controls the size of the text in the single event post sidebar / meta content (in CSS pixels, e.g. 16px).
- Events Sidebar / Meta Content Text Color: Controls the color of the text in the single event post sidebar / meta content.
- Events Sidebar / Meta Content Link Color: Controls the color of the link text in the single event post sidebar/meta content.
- Events Sidebar / Meta Content Divider Color: Controls the color of the dividers in the single event post sidebar / meta content.
Creating Events
Avada fully supports the Block Editor, and it works for creating events as well. Where Avada really shines is the set of options it offers to customize events individually. This way, you can produce unique layouts and appearances on an event-by-event basis.
The options include:
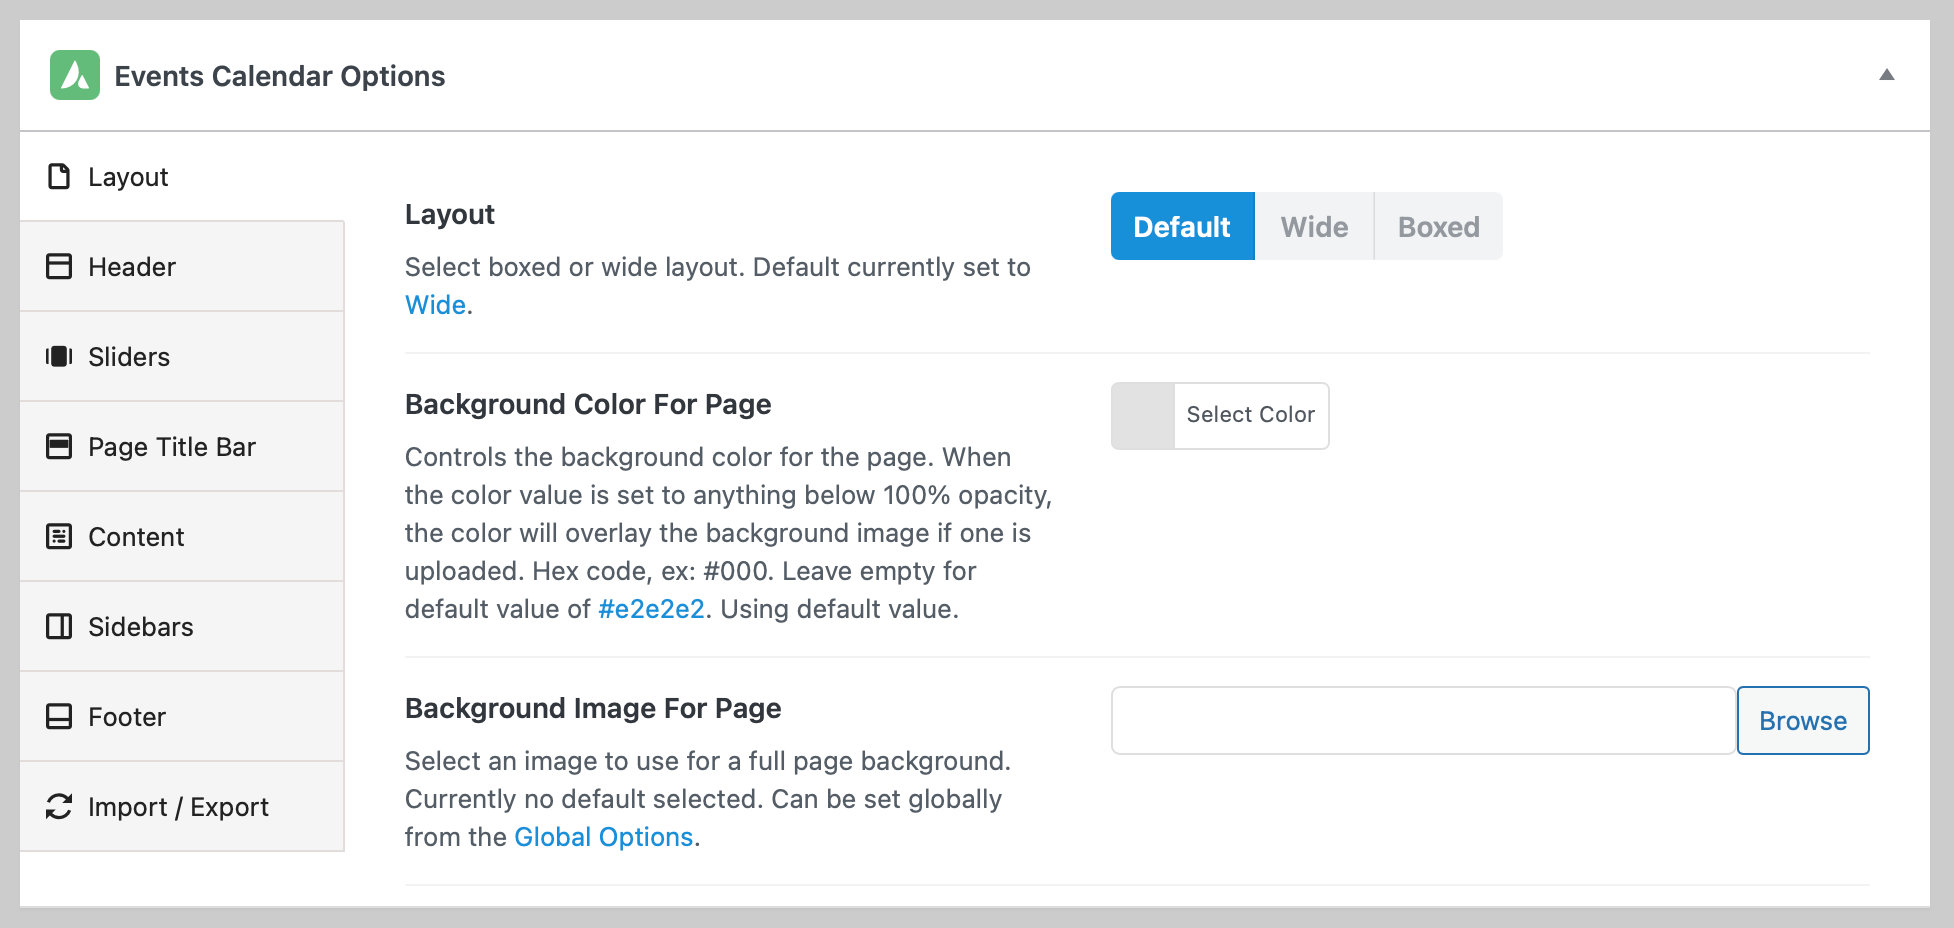
- Layout: Settings for the event background color and whether the content is contained in a border.
- Header: Settings for the event’s header at the top of the page, including the width and background color, as well as background images. There is an additional option to display a specific menu for the event, which is great for settings up larger events that might require more than a single page, like conferences that offer workshops.
- Sliders: Embed any existing slider created in Avada’s settings to the event page and specify where it is located.
- Page Bar Title: Settings to modify the appearance of the event title that’s contained in the page header. Change the text alignment, color, and formatting options, or hide the title completely.
- Content: Settings for the content of the page, including size, background options, and social sharing.
- Sidebars: Assign up to two sidebars to the page and specify how they display in various situations, like mobile and desktop screens.
- Footer: Display widgets and copyright information, and the width of the bottom of the page.
- Import / Export: Avada allows you to export the settings for an individual event to use on other events, or import the settings from a different event.
Building Single Event Layouts with Avada Builder
Avada Layouts is a powerful templating system that enables you to create custom layouts for any part of your website.
Since Avada 7.11.10, there is a complete range of TEC dynamic content to create custom layouts and templates for your events.
How to Get Started with Single Event Layouts:
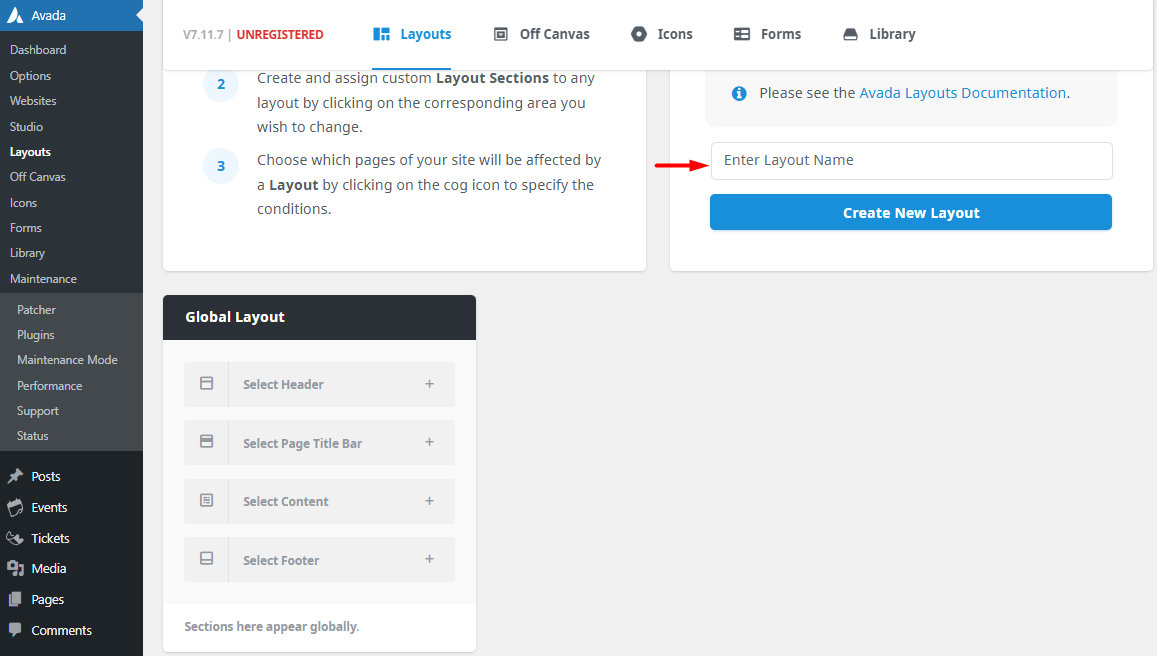
- Go to Avada → Layouts.
- Enter a name for your layout and click Create New Layout.
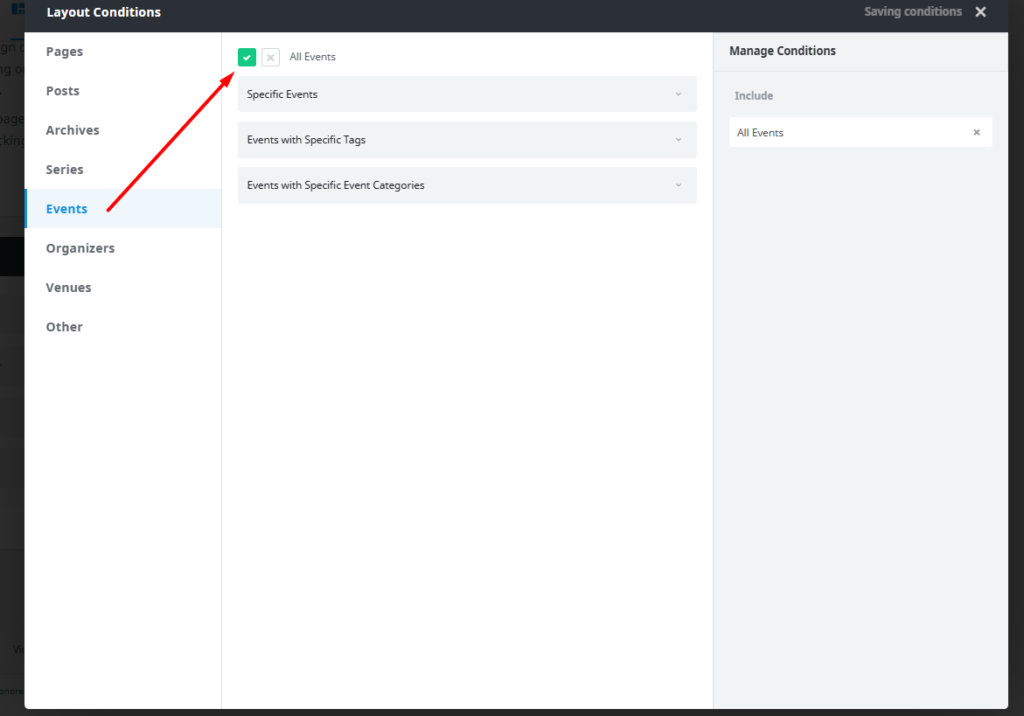
- Click the settings gear icon to select the layout conditions.
- From the left sidebar, choose Events and specify your layout rules (e.g., all events, by category, specific events).
- Create a content section and assign a name to it.
- Hover over the created Content Area and click the edit icon.
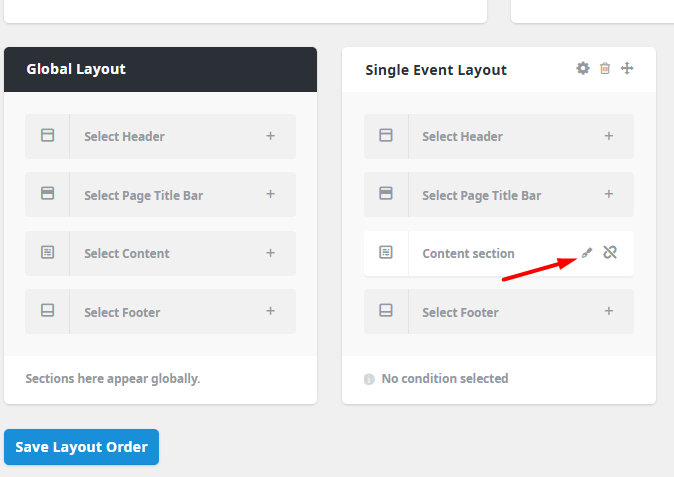
- Begin building your layout using Avada’s native TEC blocks to craft a personalized event display.
The layout building process is explained in detail in this Avada documentation.
Including the Tickets Block
Although Avada does not currently offer a dedicated ‘Tickets’ block, you can still display event tickets dynamically in the Single Event layout by using the [tribe_tickets] shortcode in combination with Avada’s dynamic content feature. Here’s how:
- Once on the content section, add a Text Block from the ‘Design Elements’ tab.
- Set the Text Block to dynamic content.
- Select Shortcode as the dynamic content type.
- Enter the
[tribe_tickets]shortcode.
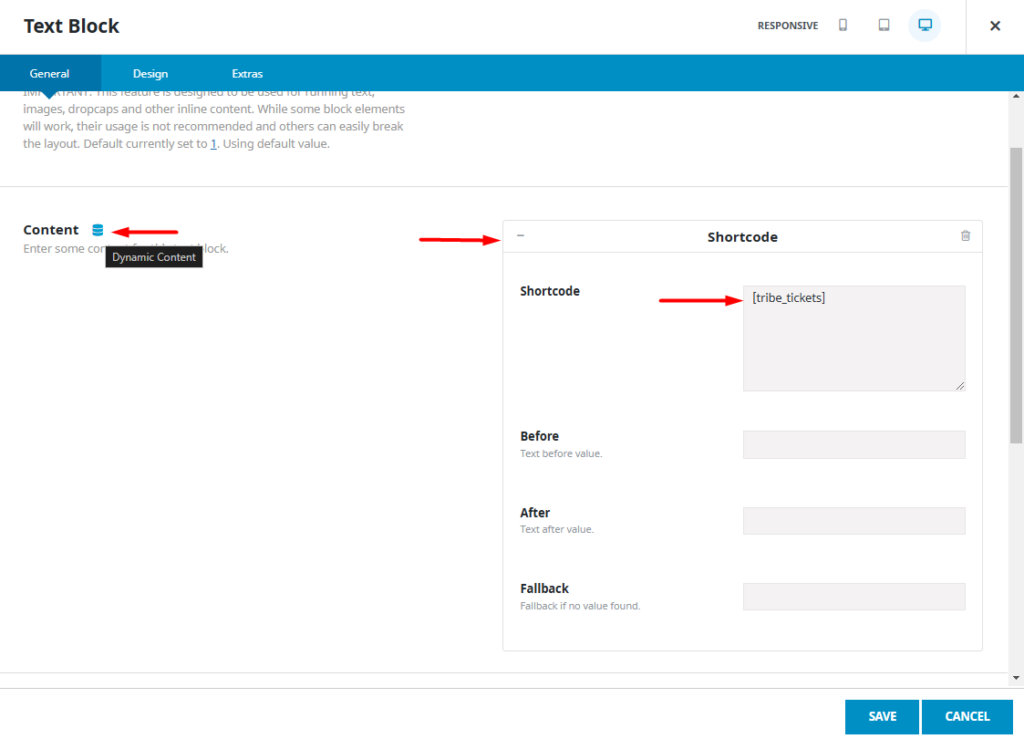
This setup will allow you to place event tickets into your custom layout.
Fixing Display Issues
Note: The issues listed below are associated with older versions of Avada and The Events Calendar. These conflicts have been resolved in recent updates to both the theme and the plugins.
We work closely with Theme Fusion, the team behind Avada, to ensure compatibility between The Events Calendar, Avada, and our other plugins. Past conflicts have been addressed in recent versions of both the theme and plugins, as documented below.
To minimize potential issues, we recommend using the latest versions whenever possible and testing updates in a staging environment before applying them to your live site.
If you do run into an issue using The Events Calendar with Avada, please let us know, and we will work with Theme Fusion to correct it or offer guidance on how to correct it.
Fixing the Month View Design
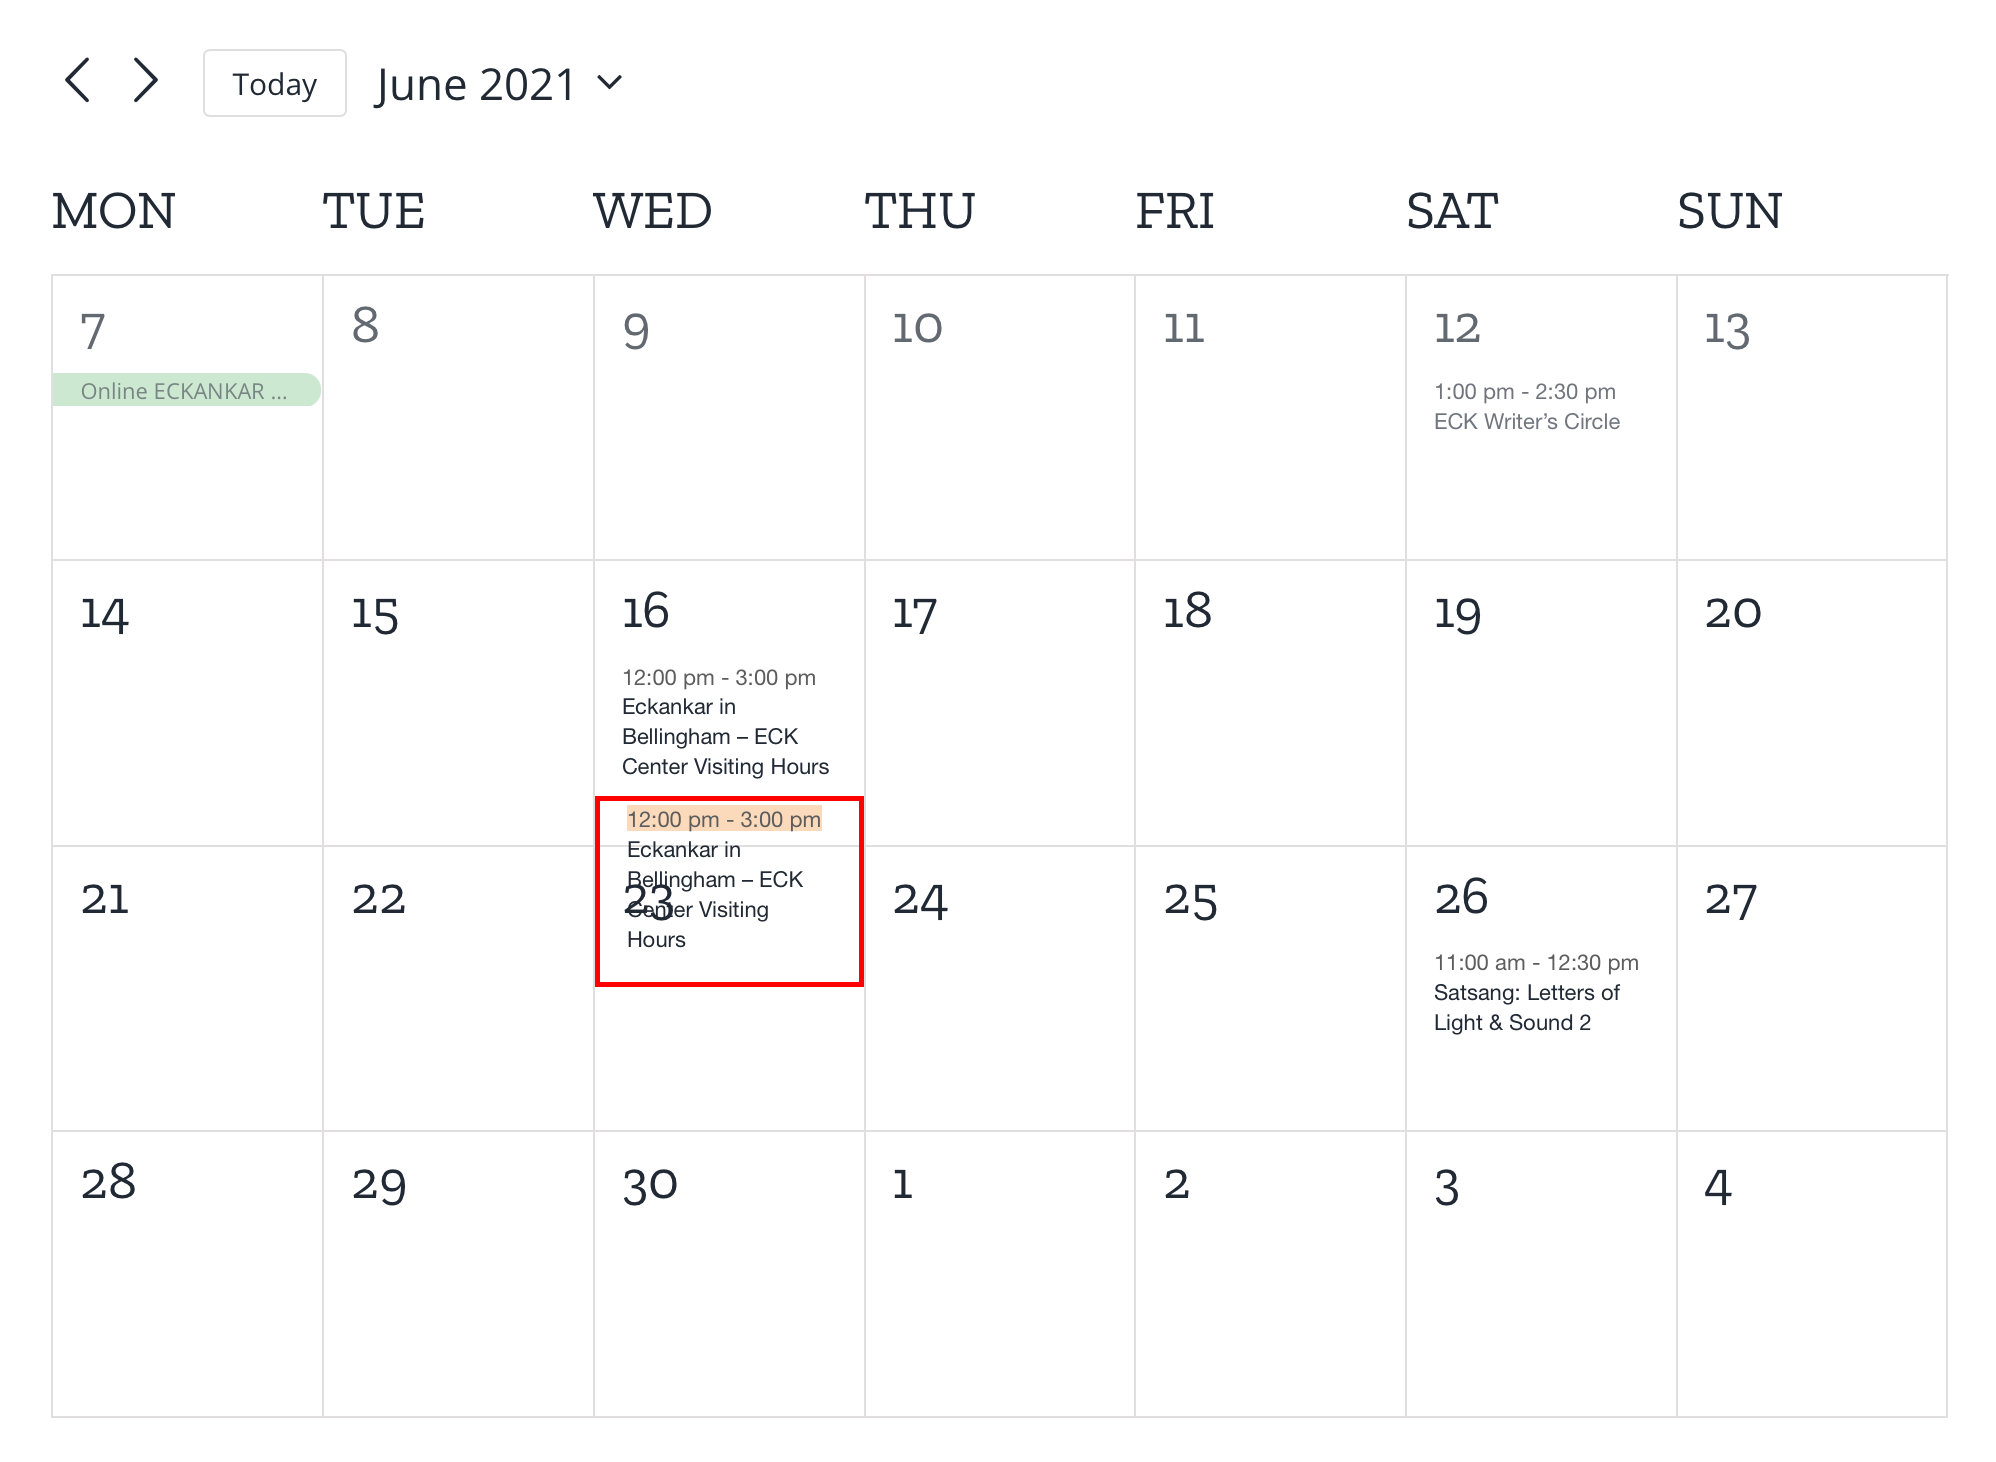
We are working with the Theme Fusion team to officially fix this issue, but for now, you can work around this by adding the following to the “Additional CSS” section of the WordPress Customizer, or using Avada’s Custom CSS section under Avada→Options→Custom CSS:
.tribe-events .tribe-events-calendar-month__day {
  height: auto;
}
July 2 2021 update: the Avada team confirmed this is going to be fixed in the next release (7.4.2).
Fixing the Calendar’s Icons
A known issue exists where the calendar’s updated icons in The Events Calendar 5.3 are either missing or improperly sized. This was fixed in Avada 7.2, so be sure to use that version or above when working with The Events Calendar 5.3 and above.
Fixing the Calendar Widget
Another issue that prevents embedding The Events Calendar widget on a site using the Avada theme was fixed in The Events Calendar 5.5.
Fixing the Ticket Form Design
The ticket form in our Event Tickets plugin experienced a design issue that affected the plus (+) and minus (-) buttons that update the ticket quantity. This was fixed in Avada 6.2. However, if you are unable to update to a newer version of the theme, we have a CSS snippet you can use as a workaround.
#tribe-tickets .tribe-tickets__item .tribe-tickets__item__quantity button {
  border: none;
  box-shadow: none;
  color: black;
  font-weight: 600;
  background: none;
}
Additional Resources
- How to use The Events Calendar With Avada: Avada’s documentation for setting up the theme and plugin together, including demos.
- Avada Events Element: Avada includes a calendar element to drop into any page or post. Showcase one or many events and customize it to suit your needs, from which events to include to what text is displayed.
- Avada Facebook Group: A free Facebook Group for posting questions about Avada. It’s an excellent place to get advice from others and even search for existing answers to questions.
- Avada Elements Video: This video looks at how to use the Events Element in Avada Builder.