Doing a conflict test on your live site may not always be possible since it will effect how the live site looks for users. In these cases, we suggest testing on a staging site, however, that might not always be possible.
This is where the Health Check & Troubleshooting plugin comes in handy. It’s a tool for diagnosing issues on your site, especially when it comes to identifying potential plugin or theme conflicts that doesn’t impact the live experience for your visitors.
That said, due to different variables, the results may not always fully replicate the effect of deactivating plugins or themes directly. In these cases, you might encounter misleading outcomes, which is why using a staging site is always preferred if possible.
Installing the plugin
The “Health Check & Troubleshooting,” is available through the WordPress.org repository. To install it automatically, go to Plugins > Add New in your WordPress dashboard, search for “Health Check & Troubleshooting”, and click Install Now, then Activate.
To install the Health Check & Troubleshooting plugin manually, download the plugin ZIP file from the WordPress plugin repository, then go to Plugins > Add New in your WordPress dashboard, click Upload Plugin, select the downloaded file, and click Install Now. After installation, click Activate to enable the plugin.
Using the plugin
Accessing the plugin
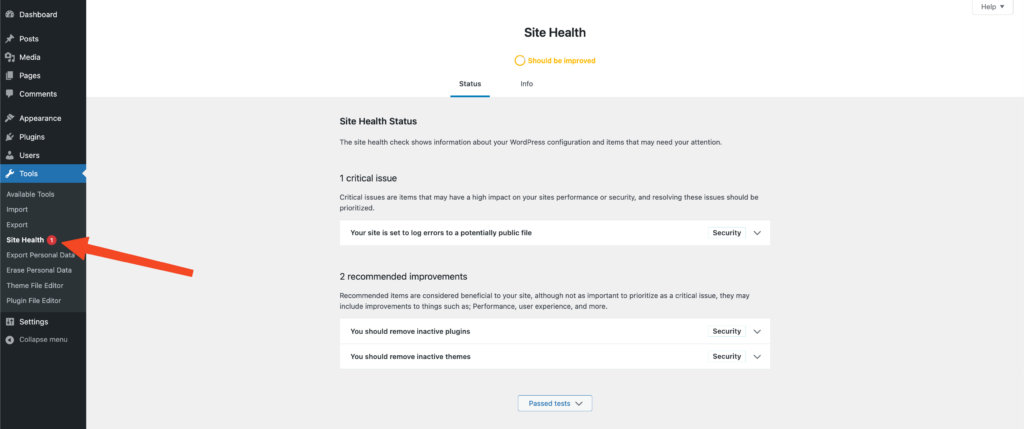
To access the plugin go to Tools > Site Health. The default overview page offers a similar view to the in-built health check tool in WordPress.
Troubleshooting Mode
Troubleshooting Mode is the heart of the Health Check & Troubleshooting plugin. It’s the most helpful feature for safely testing and diagnosing issues on your site. With Troubleshooting Mode, you can deactivate themes and plugins just for your session, so you can figure out what’s causing conflicts—without affecting your live site or visitors.
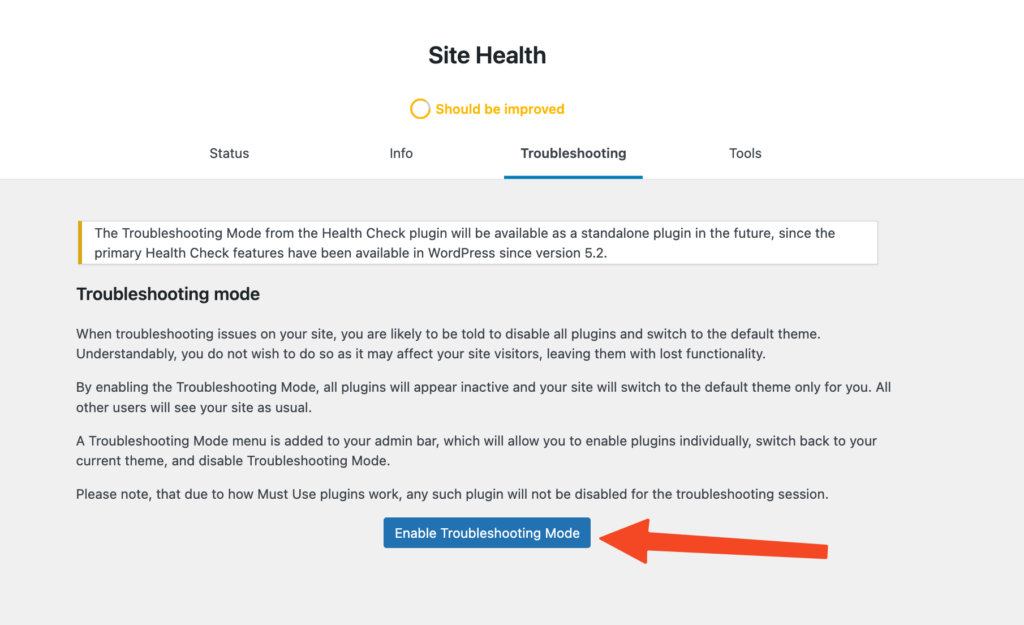
To enable this, go to Tools > Site Health > Troubleshooting, then click Enable Troubleshooting Mode:
Once you’re in Troubleshooting mode, you’ll see that all plugins are disabled by default. To activate plugins, go to Plugins, and click Enable while troubleshooting:

Note: To be able to activate a plugin in Troubleshooting mode, the plugin must already be active before you go into troubleshooting mode, otherwise, you don’t have the option to activate it.
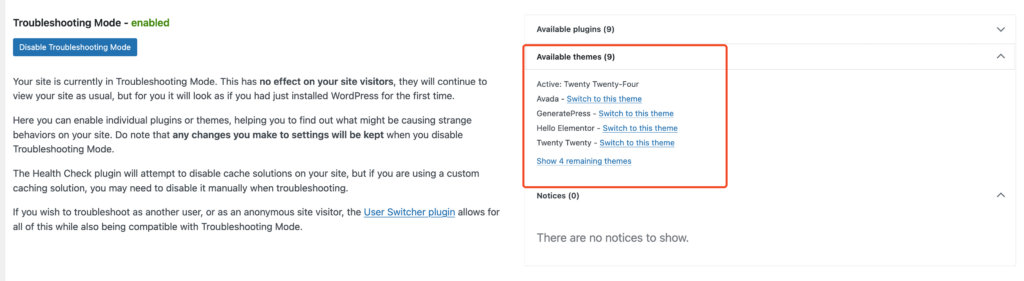
Switching the theme in troubleshooting mode is different from the normal way you’d do it. By default, the mode will switch to a default theme (like Twenty Twenty-Four). To change this, you should go to the admin Dashboard where you’ll see the Troubleshooting Mode section. Here, you can click on Available Themes, and switch to any theme you have installed on your site. Since you’re doing a conflict test, make sure you have a theme installed that’s fully compatible with all The Events Calendar plugins, like the default Twenty Twenty theme before enabling troubleshooting mode:
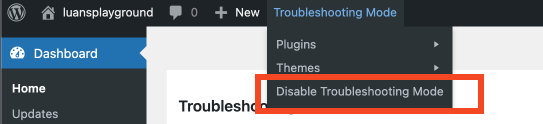
To disable troubleshooting mode, you can go to your Dashboard and click “Disable Troubleshooting Mode” (image above), or you can do that from your Admin bar:
Using this guide with our Conflict Testing guide is a powerful combo to identify conflicts on your site.