Why Clearing Cache Matters
Caching helps speed up your website by storing temporary data. However, outdated cache can cause problems such as:
- Not seeing recent changes to your site
- Broken layouts after theme or plugin updates
- Form or script errors after a migration or redesign
To fix these issues, you often need to clear both site cache and browser cache.
1. Clear Your Site Cache
If you’re using a CMS like WordPress, you likely have caching plugins or hosting-level cache. Here’s how to clear them:
A. WordPress Caching Plugins
WP Super Cache
- Go to your WordPress dashboard.
- Navigate to the top header and click on Delete Cache menu as shown below:
W3 Total Cache
- Go to your WordPress dashboard.
- Navigate to the top header and click on Performance ⇾ Purge All Caches menu as shown below:
LiteSpeed Cache
- In your WordPress dashboard, go to LiteSpeed Cache > Toolbox.
- Click Purge All to clear all cache types as shown below:
WP Fastest Cache
- Go to your WordPress dashboard.
- Navigate to the top header and click on WP Fastest Cache ⇾ Clear All Cache menu as shown below:
Breeze Cache
- Go to your WordPress dashboard.
- Navigate to the top header and click on Breeze ⇾ Purge All Cache menu as shown below:
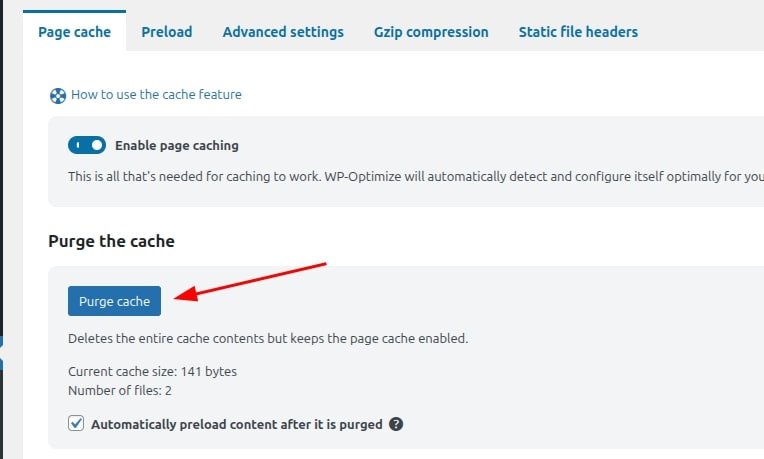
WP-Optimize
- Go to your WP Admin dashboard.
- Navigate to WP-Optimize ⇾ Cache ⇾ Purge Cache as shown below:
Sometimes, simply clearing the plugin cache isn’t enough, as it can regenerate over time. We recommend excluding our plugins’ files and resources from caching to prevent issues. You can refer to our list of cache-specific guides here: Caching with The Events Calendar
B. Hosting-Level Cache
Most managed WordPress hosts offer built-in caching systems:
SiteGround
- Log in to Site Tools.
- Go to Speed > Caching.
- Click Flush Cache.
For more details on clearing SiteGround Cache, check out this article.
Kinsta
- Log in to MyKinsta.
- Go to your site’s Caching menu.
- Click Clear All Cache.
For more details on clearing Kinsta Cache, check out this article.
2. Clear CDN Cache (If Using One)
Cloudflare
- Log in to your Cloudflare dashboard.
- Select your website.
- Select Caching > Configuration.
- Under Purge Cache, select Purge Everything. A warning window appears.
- If you agree, select Purge Everything.
For more details on clearing Cloudflare’s CDN Cache, check out this article.
3. Clear Your Browser Cache
Here’s how to clear cache in popular browsers:
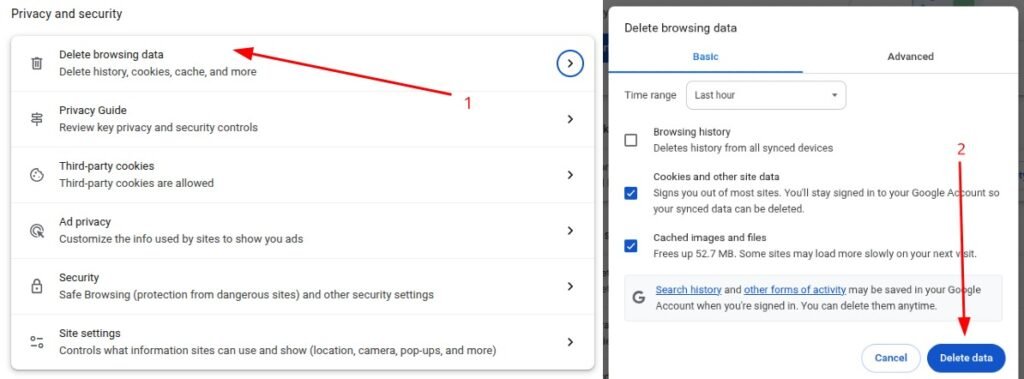
Google Chrome
- Click the 3-dot menu.
- Go to Settings ⇾ Privacy and Security.
- Click Delete Browsing Data.
Mozilla Firefox
- Open the menu ⇾ Settings > Privacy & Security.
- Under Cookies and Site Data, click Clear Data.
- Finally, click Clear.

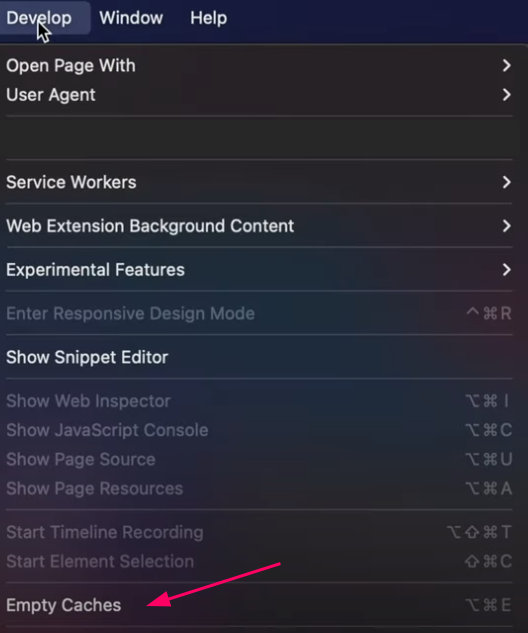
Safari (macOS)
- Enable Develop menu under Preferences > Advanced.
- In the menu bar, go to Develop > Empty Caches.
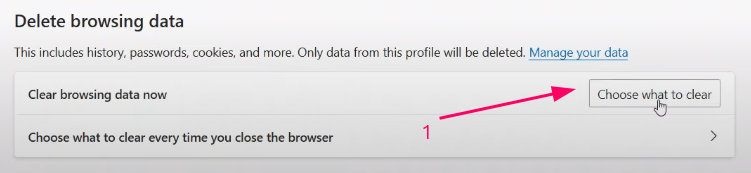
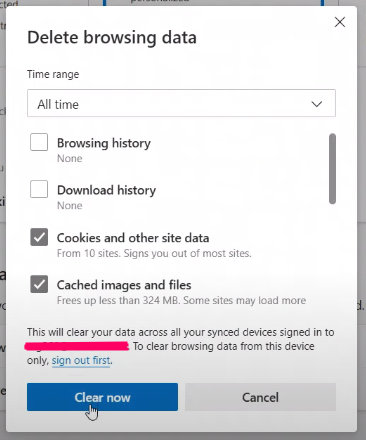
Microsoft Edge
- Click the 3-dot menu > Settings > Privacy, Search, and Services.
- Click Delete Browing data.
- Click Choose what to clear.
- Select Cached images and files and click Clear now.
Pro Tip: Do a Hard Refresh
Sometimes a simple hard refresh clears up display issues:
- Windows/Linux:
Ctrl + F5 - macOS:
Cmd + Shift + R
Still Having Issues?
Try the following:
- Try opening your site in incognito mode
- Use a different browser
- Flush DNS:
- Windows: Run
ipconfig /flushdnsin Command Prompt - macOS: Run
sudo dscacheutil -flushcache; sudo killall -HUP mDNSResponderin Terminal
- Windows: Run
Conclusion
Clearing cache is a simple but essential step to avoid outdated content or display issues on your site. Whether you’re using a caching plugin, CDN, or browser, this guide gives you the tools to troubleshoot caching effectively. For best results, follow your caching plugin’s compatibility guide.