You can access the settings for The Events Calendar and Events Calendar Pro from the WordPress Admin by following Events → Settings from your WordPress admin bar or sidebar. The settings offer a lot of cool options to get your calendar looking just the way you want it.
Let’s review what each of the options entails. Note that some of the settings below are specific to Events Calendar Pro and are marked as such.
Note: As of The Events Calendar 6.2.0, you can now attach multiple venues to an event.
Calendar Footer Link
You have the option to display a small “Calendar powered by The Events Calendar” link in the footer of your calendar views. To enable or disable this: Go to Events → Settings → General → Viewing, then check or uncheck the “Show The Events Calendar link” setting. This lets you choose whether or not to include attribution on your site’s calendar views.

Timezone
To ensure smooth transitions during Daylight Saving Time (DST), it’s recommended to use location-based time zones for all events. Location-based time zones automatically adjust for DST changes, while UTC-based time zones remain static and may require manual adjustments.
Navigate to Events → Settings → Display → Date & Time in your wp-admin dashboard. Under Date & Time Settings, you’ll find the time zone options, offering two choices:
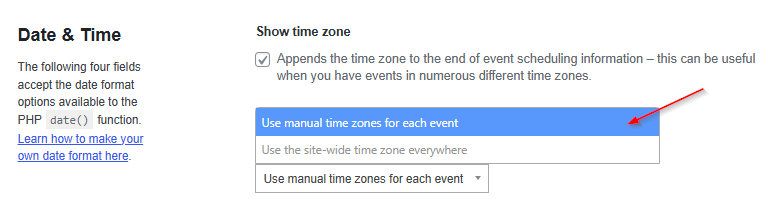
- “Use site-wide time zone everywhere”: Event times will be displayed based on the time zone set in your WordPress general settings.
- “Use manual time zones for each event”: Event times will reflect the time zone individually selected for each event.
Note: Still have questions? See our comprehensive overview on Working with Timezones for more information.
Changing the first day of the week
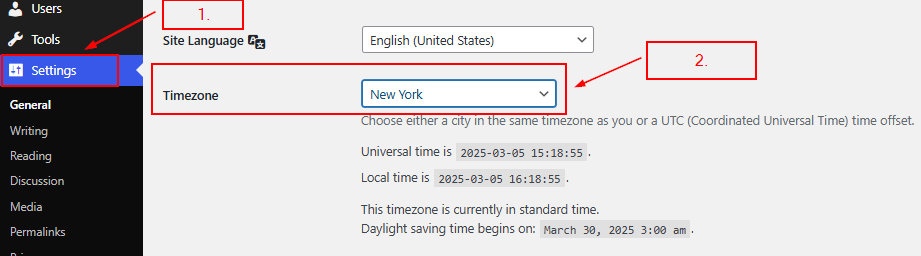
You can adjust the first day of the week shown in your calendar views directly from your WordPress general settings. Simply go to your wp-admin → Settings → General, choose your preferred starting day of the week from the Week Starts On selector, and save your changes.

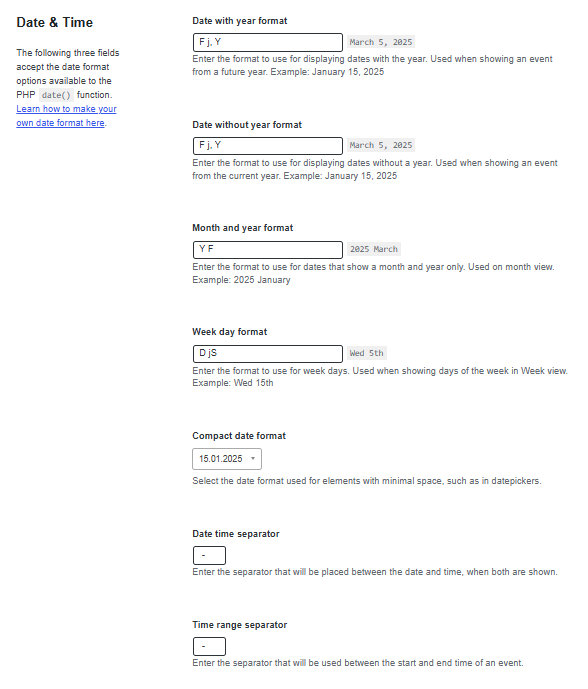
Date Format Settings
The Events Calendar uses WordPress settings to determine which day is the start of the week, the default timezone, and how dates and times are formatted.
However, you can override WordPress settings and configure date and time settings directly within the plugin. This way, you can set the options for your site one way and the options for your calendar another way.
Navigate to Events → Settings → Display → Date & Time to configure date format settings just for the calendar.
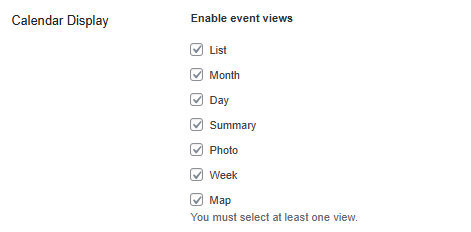
Enable views & set the calendar default view
The Events Calendar supports three calendar views right out of the box:
- List View: Events are presented in a list format, like a traditional blog
- Month View: Events are showcased on a traditional calendar grid
- Day View: Events for the current days are displayed in List View
Events Calendar Pro provides additional views:
- Summary View: Events displayed as a quick overview of upcoming events
- Photo View: Presents events in a visually appealing photo gallery format
- Week View: Displays events across the span of a week
- Map View: Google Maps is integrated with the events list, updating locations in real time as users interact with events
To enable or disable these views:
- Navigate to Events → Settings → Display → Calendar in your wp-admin dashboard
- Under Calendar Display, locate the Enable event views option
- Tick your desired views
- Save your changes
By default, the plugin settings display the List view. To change the default view that users see when they first visit the calendar, change the “Default view” setting:
- Navigate to Events → Settings → Display
- Under Calendar Display Settings, locate the Default view setting
- Select your desired default view from the dropdown menu
- Save your changes

Creating a new Event
This is actually really easy. Let’s start in the WordPress dashboard — you should be able to find a menu entry called Events and, if you click on it, you should see the Add New button.
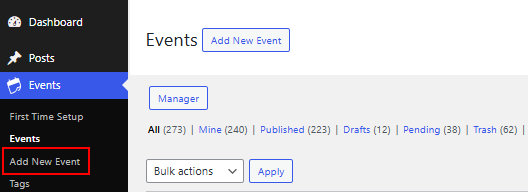
Once you’ve found it, go ahead and click on it! This should bring you to the event editor.
The event editor hopefully won’t contain too many surprises: it is intentionally almost identical — at least at first glance — to the regular page and post editor used by WordPress itself.
So, if you’re familiar with WordPress, you should feel right at home. Here is how to create an event in the classic editor:
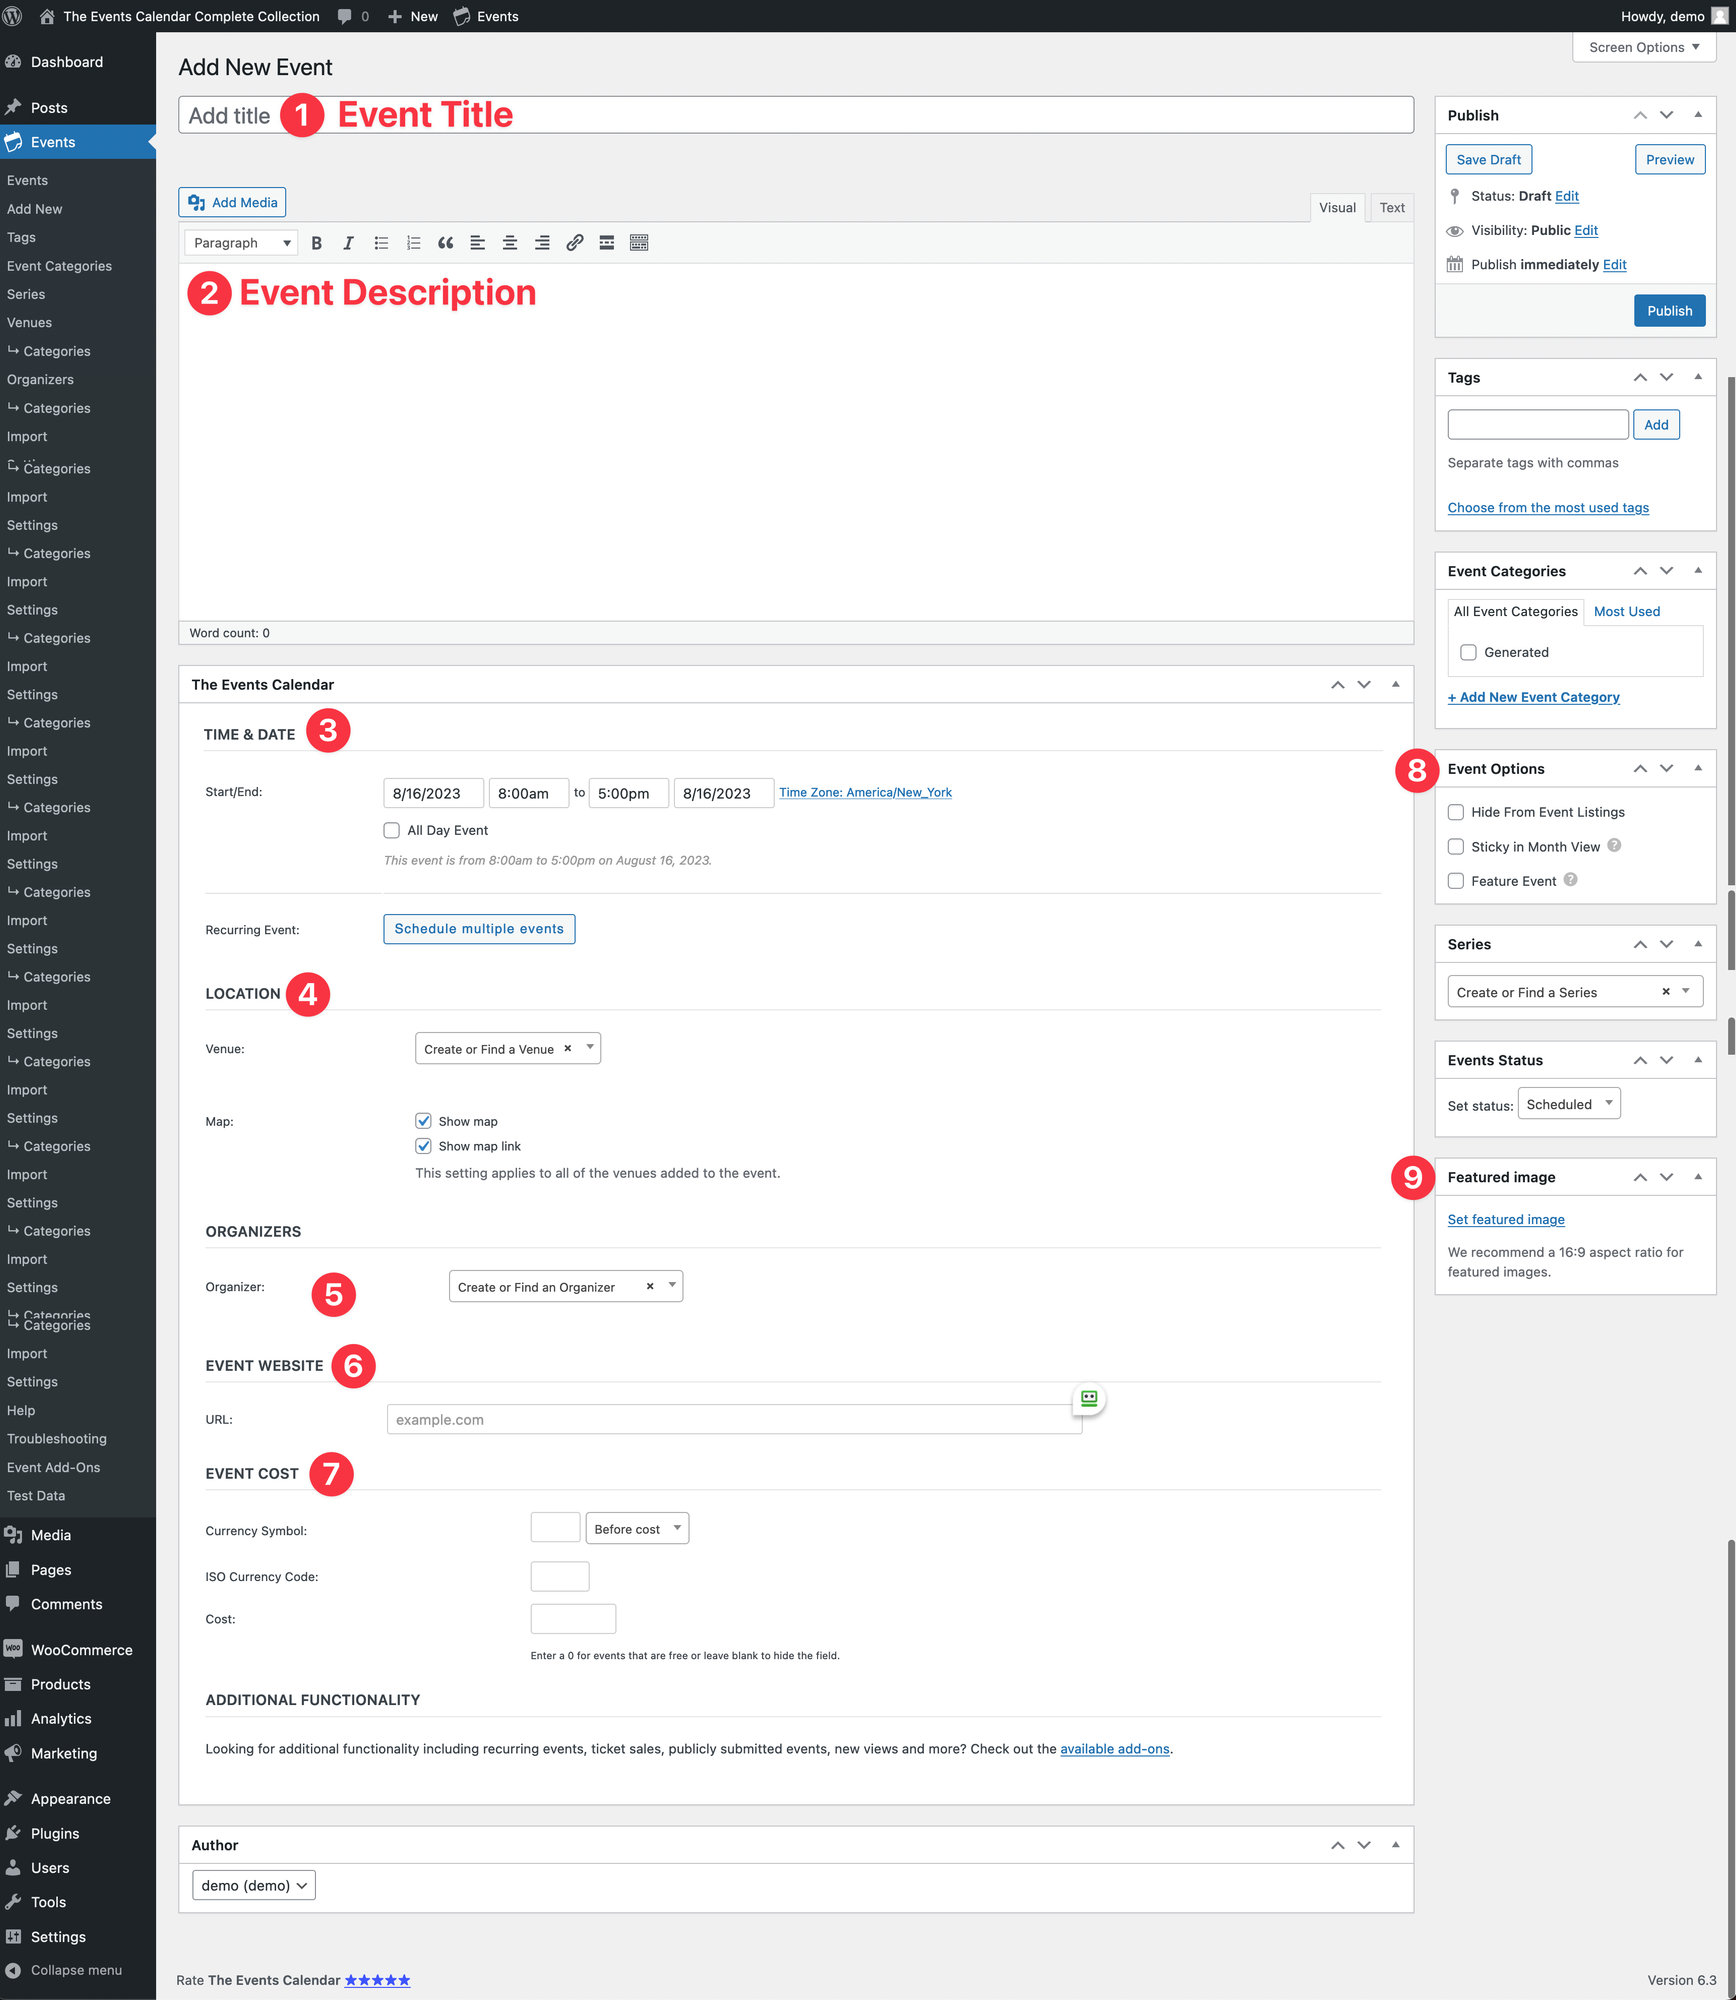
- Add a title to your event
- Describe it
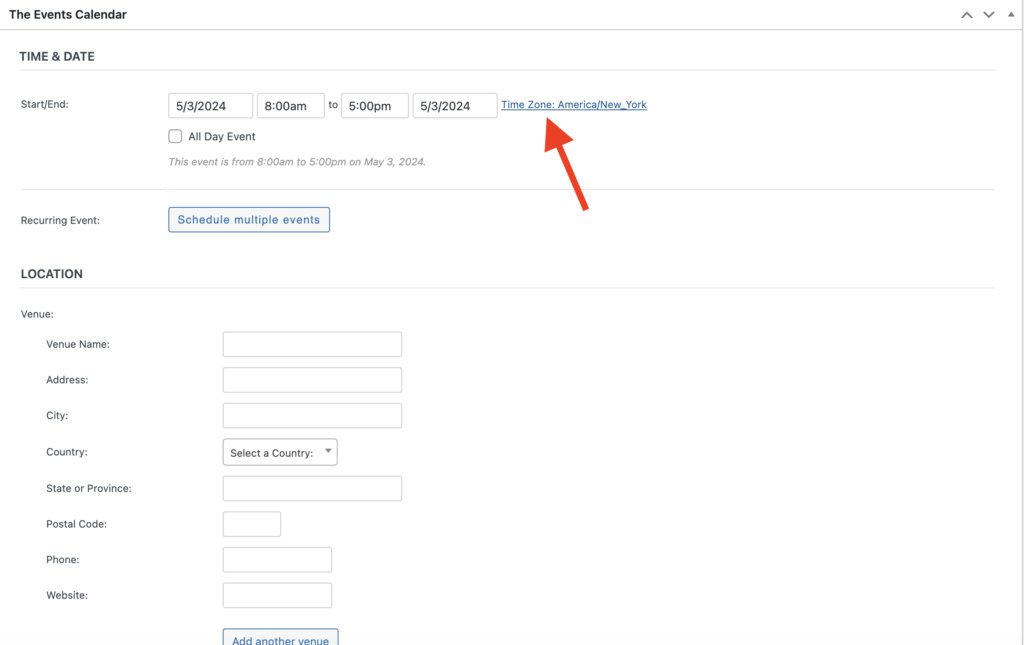
- Select the date and time for your initial event (required), as well as any desired recurrences (optional)
- Select an existing venue or create your own (optional). If you’re using Events Calendar Pro, you can attach more than one venue to an event
- Specify the event organizer (optional)
- Link to an external website about the event (optional)
- Determine the cost of the event
- Determine if the event should be featured (optional)
- Upload a featured image to display in event listings (optional)
If you are using Block Editor, the default layout will look slightly different:

- Add a title to your event
- Select the date and time for your initial event (required), as well as any desired recurrences (optional)
- Describe your event
- Add a price for your event (optional)
- Specify the event organizer (optional)
- Select an existing venue or create your own (optional). If using Events Calendar Pro, you can attach more than one venue to an event. To add another venue, click on the three vertical dots and select Add Before or Add After. Type /venue and select the Event Venue block.
- Link to an external website about the event (optional)
- Provide visitors with a way to add this event to their own calendar software (optional)
- Show related events (optional)
- Display tickets/RSVPs if using Event Tickets and Event Tickets Plus (optional)
- Show who is attending the event if using Event Tickets Plus (optional)
- Select an Event Category (optional)
- Upload a featured image to display in event listings (optional)
- Determine if the event should be featured (optional)
If you need help with creating events, please see Creating an Event.
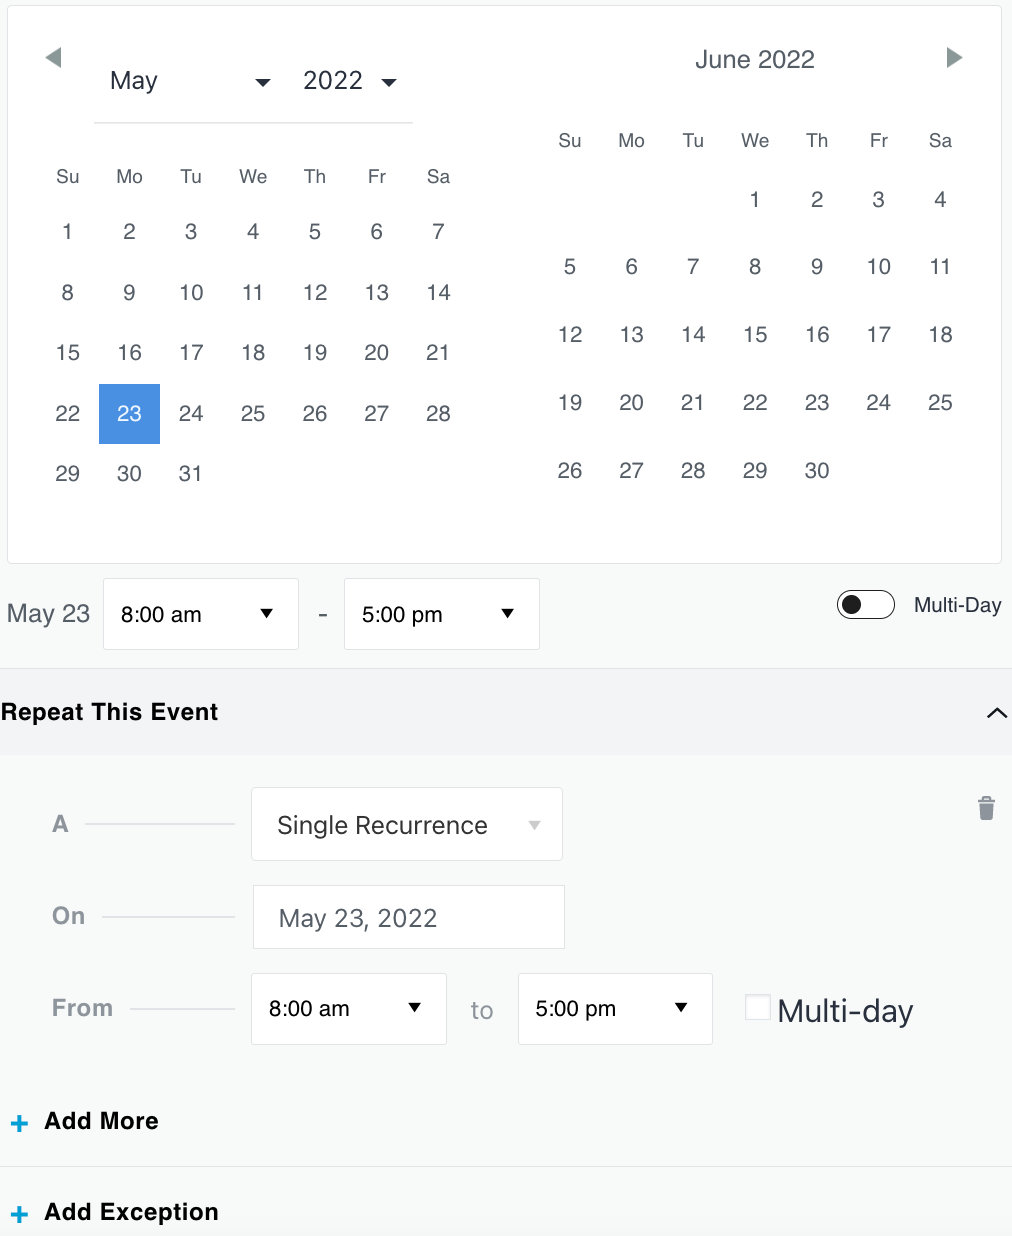
Creating a Recurring Event
Note: This is a feature limited to Events Calendar Pro.
In the Time & Date settings of your event, you will find the Event Series settings, which are used to turn one event into a recurring event.
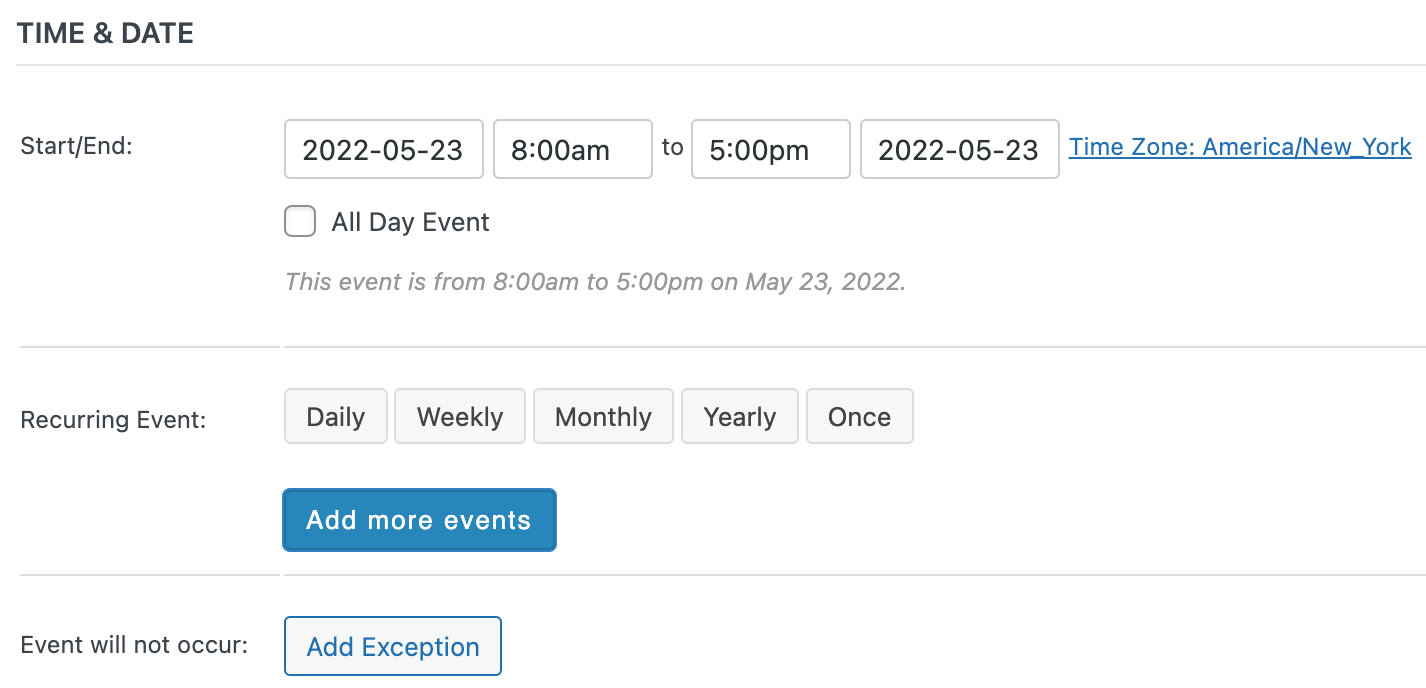
Note: Still have questions? See our comprehensive overview on Recurring Events for more information.