The Events Calendar includes a CSV importer tool which allows you to import events, venues, and organizers into your site’s calendar. This is a great way to quickly and easily add a lot of content to your calendar all at once.
The importer is part of our full-featured Event Aggregator plugin, which, if you purchase a license, can also import from other sources like iCal. The CSV import tool is free, however, and included when you install The Events Calendar.
Before we get started, it’s worth noting that importing events with a CSV file will update existing events if it meets all of the following conditions:
For All-Day Events:
- The event title is identical.
- The event is marked as an all-day event.
- The start date (date only, from
_EventStartDate) matches exactly.
For Timed (Non-All-Day) Events:
- The event title is identical.
- The start date and time are exactly the same.
- The end date and time are exactly the same.
These conditions help ensure that only genuinely identical events are updated during import.
You lost me at CSV…
CSV is a file format that stands for comma-separated values. These files are often produced by spreadsheet applications like Excel and Numbers, but they can come from other sources as well. This file type converts a spreadsheet file from a format that uses cells to separate content to a file format that separates content using commas.
For example, a spreadsheet file with the following cells:
| Cell 1 | Cell 2 | Cell 3 |
… would be converted to this in CSV:
Cell 1,Cell 2,Cell 3
This is important because it makes the data contained in the spreadsheet readable to importing tools like Event Aggregator.
Generating a CSV file
Saving a spreadsheet as a CSV file is often an option in the save settings of the application (such as Microsoft Excel) you are using. In most cases, you will go to File → Save As from your application and select the option to save the file in CSV format.
This is the file you will use to import events to The Events Calendar. You can learn more about the specific fields available and download example files in another article.
💡 Some versions of Microsoft Excel may export CSV files with non-standard separator characters (such as semicolons) by default. To ensure that your CSV exports can be successfully imported, please ensure that your Excel settings are configured to export CSV files with the comma (
,) separator. Please refer to the documentation for your software if you should have any questions about how to adjust this setting.
Importing a CSV File
Follow the step-by-step instructions below to learn how to import data from a CSV file.
Go to the Import screen
From the WordPress dashboard, navigate to Events → Import in the left-hand menu.
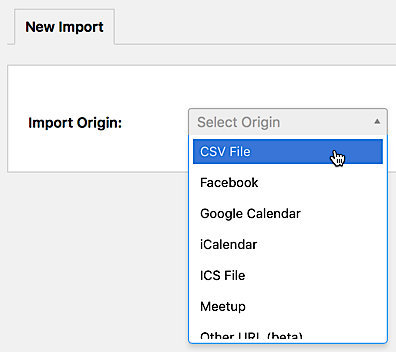
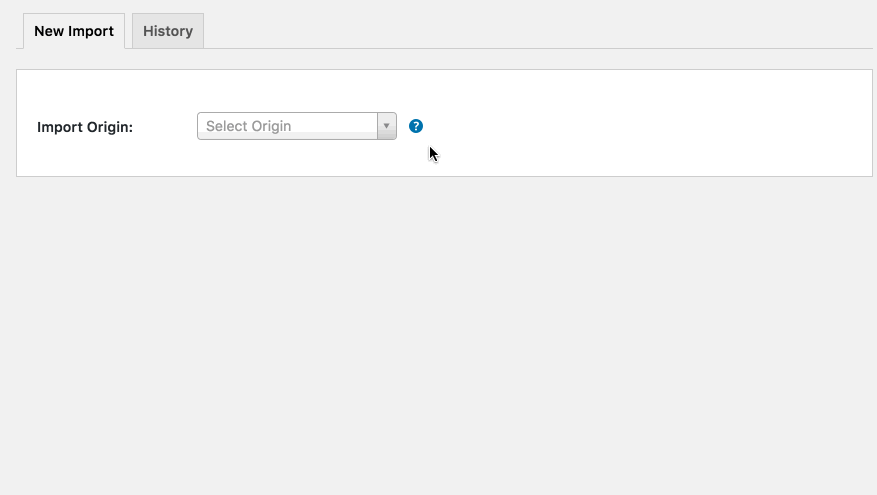
Select CSV as the import origin
The first field on the screen will ask you to identify the source of your new import. Select CSV File from the list of options.
Select the type of content to be imported
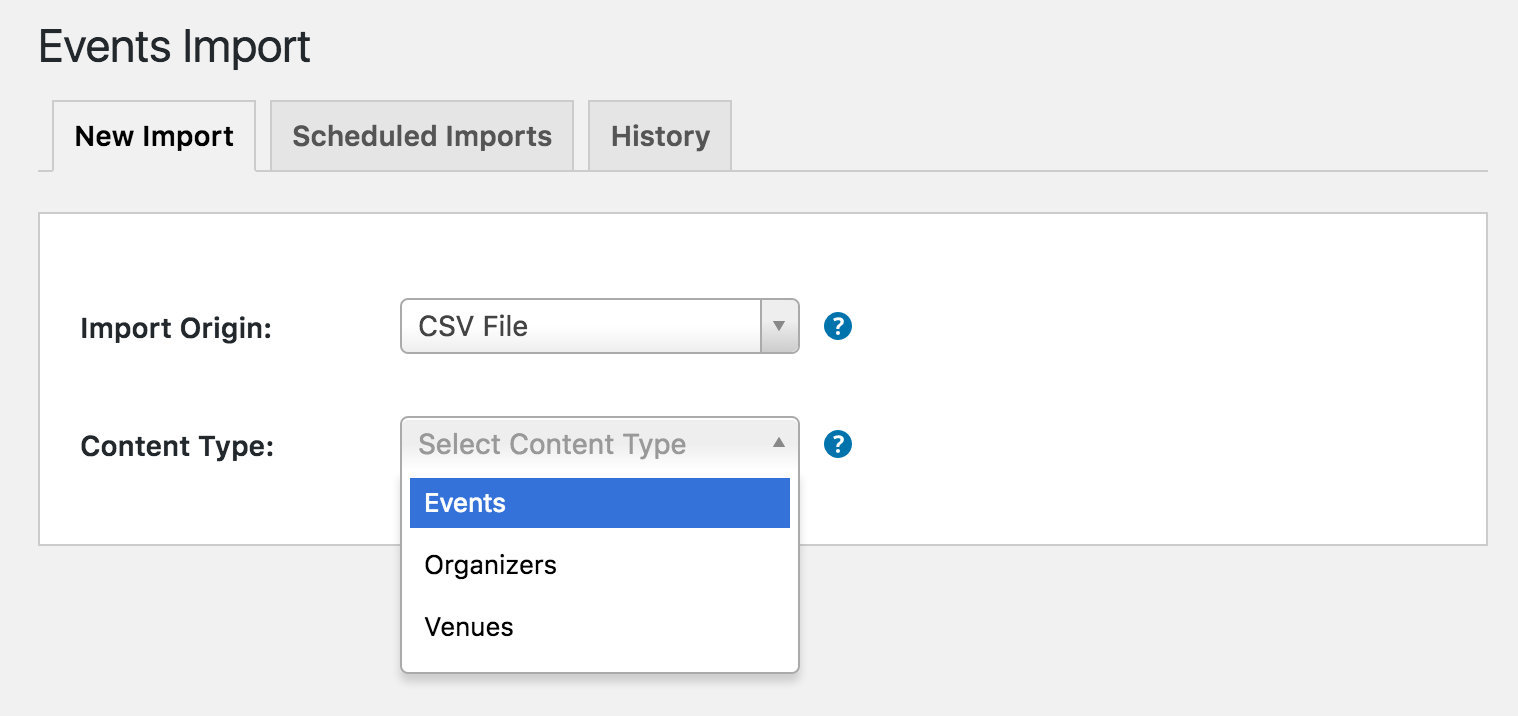
By default, there are three options for data types that can be imported using The Events Calendar.
- Events: Posts that will be identified as events to be published on The Events Calendar.
- Organizers: Data for saved event organizers that can be associated with an event.
- Venues: Data for saved event locations that can be attached to events.
If you are planning to import venue and organizer information with your events, then you will need to import the CSV file for those venues and organizers before importing events. This will ensure that the data for both venues and organizers are available so The Events Calendar knows what information to associate with an event when it is imported.
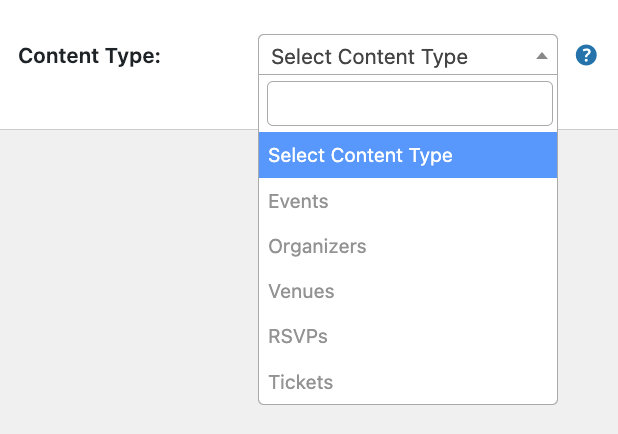
💡 If you are using Event Tickets and/or Event Tickets Plus, you will also have an option to import RSVPs or tickets via CSV.
- RSVPs option will appear on the list if you use the Event Tickets plugin.
- Tickets option will appear on the list if you’re using the following plugins: Event Tickets, Event Tickets Plus, and WooCommerce.
You’ll need to import your ticket files after you’re done importing events.
Select the file to upload
Remember when you created your CSV file? The next step is to click the Upload button and select the file from the appropriate location on your hard drive.
The CSV file you choose will be saved to the WordPress media library and will remain available for future use.
Preview the content and map your fields
Once you have selected the CSV file to upload, click the Preview button. This will generate a preview of a portion of your CSV file. Notice that the import preview is in a table format with column headings and dropdown fields. Before you can import the information, you’ll need to “map” the information from your file to the corresponding content fields in The Events Calendar. The display only includes some of the rows from your CSV file because you only need to see enough to map the fields properly. The actual import will include all the data in the file.
The column headings in your preview match the headings in the spreadsheet that became your CSV file. Each dropdown menu contains all the different content fields for an event (or venue, organizer, or ticket, depending on the content you’re importing). For each column, use the dropdown to select the correct content field for the information in that column. Scroll to the right until you have mapped all of the fields that you wish to import.

💡 If you followed our CSV file examples post, your column names will probably match the options in the dropdown. However, the options may not match if you are using a CSV file that you exported from another source. When mapping, choose the option from the dropdown that best matches the information in the column, or you may leave the dropdown selection as Do Not Import to leave that column’s data out. You can always edit the entry later.
Run the import
Now that you’ve mapped the data, you’re almost ready to run the import. But first, you have the option to set the Publish status for the data:
- Published: The content will be published to your site right away.
- Draft: The content will not be published but will be available for editing after the import.
- Pending Review: The content will not be published or saved as a draft but will be labeled as being ready for a WordPress editor or administrator to review before it is published.
- Private: The content will be published to your site right away but will only be accessible to those who are logged into the site with sufficient permissions to view the content.
You can also choose to add categories to the content from a list of existing event categories on your site. Keep in mind that this option only matters if you are currently importing events–it is irrelevant if you are importing organizers, venues, RSVPs, or tickets.
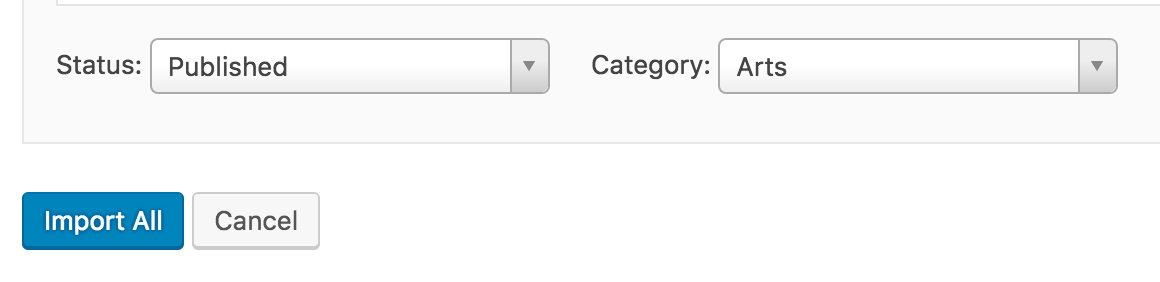
Once you’ve reviewed your settings, go ahead and press the Import All button!
⚠️ Important: All imported tickets will be treated as WooCommerce Tickets.
Overview
That’s the step-by-step process for importing events into The Events Calendar. We hope you found this helpful. Here is a final screencast of the process from start to finish:
Fixing the “Sorry, this file type is not permitted” error
Sometimes, when uploading a CSV file, you may see an error that says, “Sorry, this file type is not permitted for security reasons” error. You can resolve this error by adding the following snippet to your theme’s functions.php file.
<?php
add_filter( 'upload_mimes', function( $types ) {
    $types['csv'] = 'text/csv';
    return $types;
} );
Customizing the separator character
By default, the separator character that is recognized for CSV files is the comma; however, you may want to use a different character. You can use the following filter to change that behavior:
add_filter( 'tribe_events_csv_import_file_parameters', function( $params ) {
    $params['delimiter'] = '|';
    return $params;
} );
How to Import Tickets Commerce Tickets Using CSV Import (Workaround)
Importing Tickets Commerce (TC) tickets using the built-in CSV import feature is not directly supported at this time. However, with a few tweaks, you can achieve this. Follow the steps below to proceed:
📌 Requirements
- WooCommerce must be installed and activated temporarily for the import process to work.
- A custom snippet is required to map imported data correctly to Tickets Commerce.
🛠️ Step-by-Step Instructions
1. Install and Activate WooCommerce
Even if you don’t plan to use WooCommerce long-term, it must be active during the import process.
2. Add the Custom Code Snippet
Add the following code snippet to your site using the Code Snippets plugin (recommended) or by inserting it into your functions.php file:
⚠️ Important: Always test changes on a staging site before applying them to a live environment.
3. Import Your CSV File
Follow the same guide as shown above.
4. Verify the Tickets
After importing, confirm that your tickets were successfully imported and are appearing as expected in your events.
5. Deactivate WooCommerce (If Not Needed)
Once you’ve confirmed the tickets are working correctly, you can deactivate and delete WooCommerce if you don’t need it for anything else.